Securing Portable Drives
Introduction
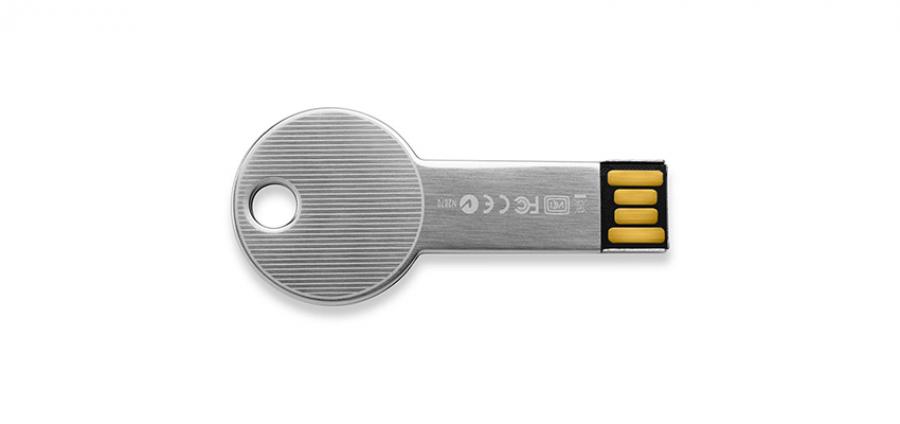
The prevalence of affordable external hard drives and other storage media has led to a real world challenge for IT managers. How can they ensure the security of data travelling on these devices?
FileVault is a great tool for encrypting data on the boot drive of a Mac, and Time Machine allows simple encryption of an external drive being used for backup data, but when using an external hard drive for the transportation of data can Mac OS X offer a simple way of password protecting that data?
Yes!
Creating an encrypted disk image
Mac OS X ships with a powerful tool called ‘Disk Utility’. The simplest, and cheapest way of creating encrypted data on an external drive is to use this built in tool.
Open Disk Utility and choose the option to create a new blank disk image from the file menu:
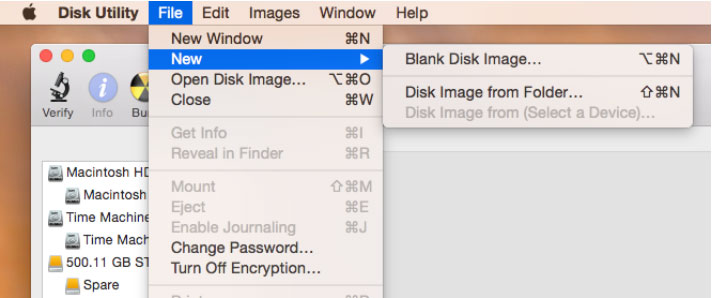
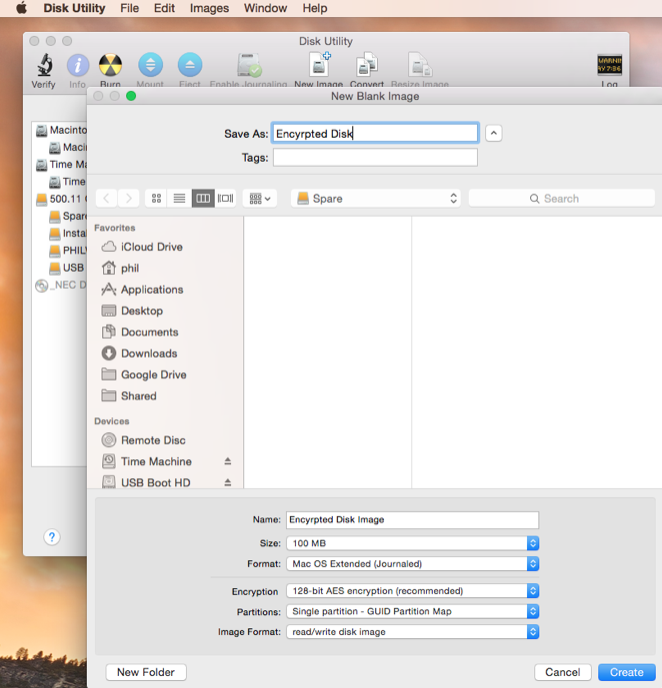
Having done that choose you need to choose a few variables for your disk image:
Save As: The name of your disk image as it would appear on the external drive. Typically this can be an employee or client name
Location: Ensure that the target location to save your new disk image in is the external hard drive. In our case the external volume is called ‘Spare
Name: Name of the encrypted volume when it mounts. Again this can be a person or company name if appropriate
Size: Choose the size of your disk image. This can be changed at a later date if necessary
Format: Choose Mac OS Extended (Journaled) for Mac volumes
Encryption: Choose 128-bit or 256-bit encryption, the latter being more secure but slightly slower to use
Partitions: Typically a single GUID partition for Mac users
Image Format: Choose read/write for the disk image to behave like a normal external volume once mounted
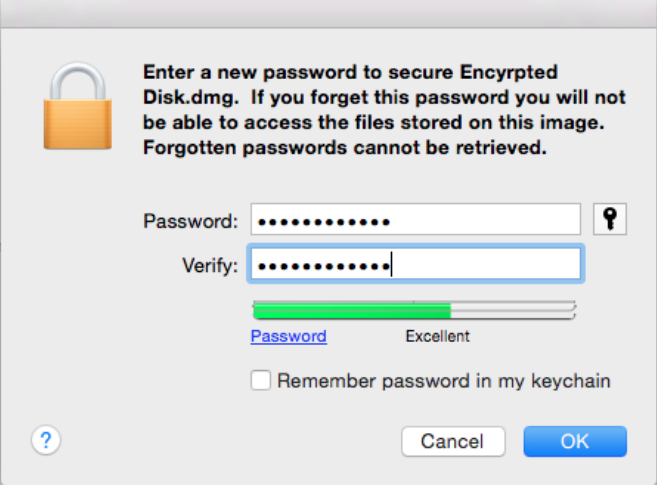
Create the disk image and a prompt will appear to choose a password. Note the fact that if you forget the password you will not be able to access the contents of the disk image.
An encrypted disk image will then be saved to your external hard drive. Anybody with a Mac can plug the external drive in and see the disk image, they can even take a copy of the disk image, but only people with the password can double click it and see the contents. Without the password which is also the encryption key, the disk image is a useless collection of ones and zeros.
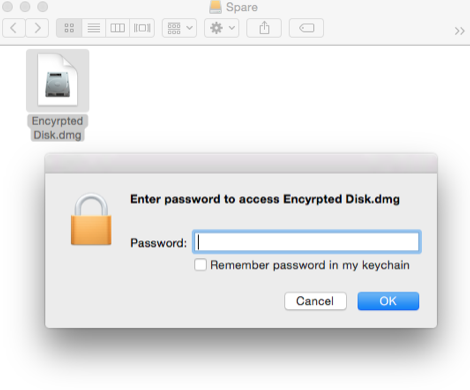
Common uses of this technique include the delivery of content to external companies, under which circumstances you can very easily send an email with a link to open the disk image and a reminder of the password like the following (n.b. %20 is the Unix representation of a space in file paths):
Hi Andy,
We’ve just sent the drive off with the courier. Should be with you in half an hour or so.
When it reaches you please plug it in and click the link below to mount the disk image. The password is smalltree66.
file:///Volumes/Spare/Encyrpted%20Disk.dmg
Kind Regards
Steph
Summary
There are bespoke commercial products out there which will allow you to password protect external drives, but why bother spending the extra cash when Mac OS X 10.10 Yosemite has all you need right there. The encryption levels are excellent and the compatibility with Mac OS X is unquestioned because it’s a built in feature of the operating system.
With minimal staff training for content creators and simple instructions for content receivers this is a great way to protect your mobile data.
 12 months interest free on any Mac over £1,000.
No Comments yet. be the first to comment.