
How to set-up and use Mail app on an iOS device
The team at our Doncaster store walk you through the basics of how to get an email account set up and how to use Mail app on your new iPad, iPhone or other iOS device. Starting with a simple set of instructions with screenshots to guide you through the process and followed by an excellent short instructional video, you should be up and running with Mail for iOS in no time!
How to add an email account
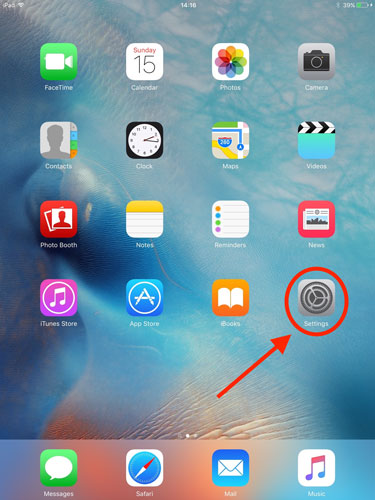
To add an email account navigate to the Settings app by pressing the settings icon.
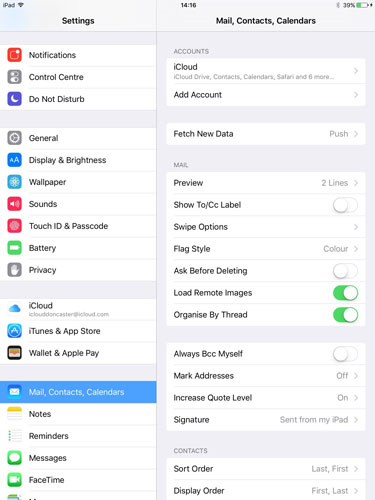
When in the settings scroll down until you see the ‘Mail, Contacts, Calendars’ tab then go into this tab. When in ‘Mail, Contacts, Calendars’ press the ‘Add Account’ button under the ‘Accounts’ section.
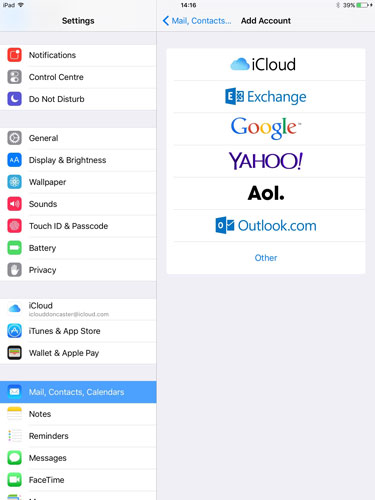
When you are in this section press the email provider your email address is registered with (usually easy to tell, it’s normally the part of your email address after the @ symbol, so in our example, Gmail), if you do not see your provider then press ‘other’.
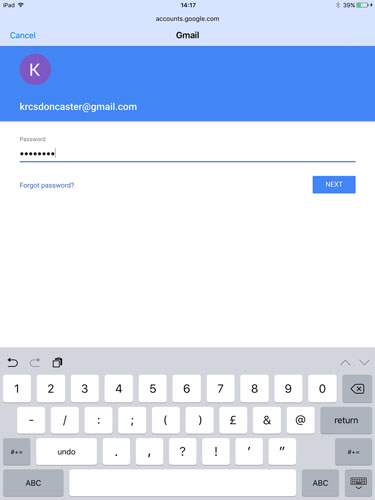
After you have pressed one of these options you will be asked to enter your email details. At this point, what information is required and in what order can vary slightly, depending on who your email provider is, again our example is one of the most common, a Gmail account.
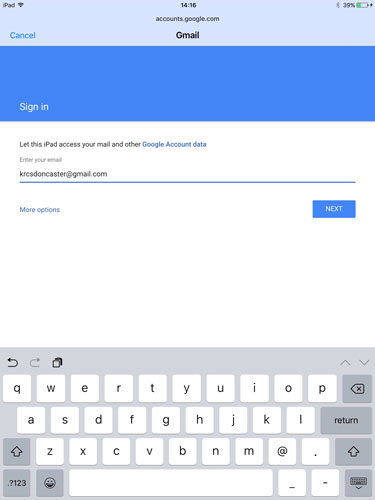
Once you’ve entered your address, press ‘next’. On the second page you will be asked for a password, enter your password then press ‘next’.
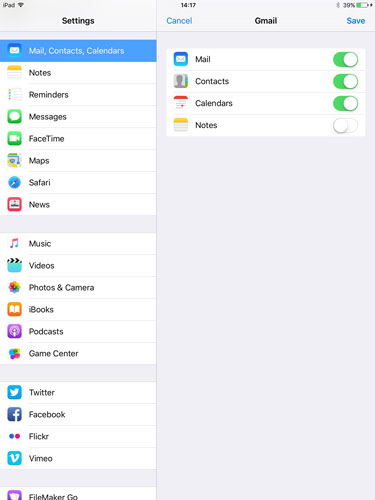
You will then be asked which services you would like to sync with your email, select or unselect the services you would like by pressing the switch next to the service. After following these steps your email account will be ready to use.
How to send an email
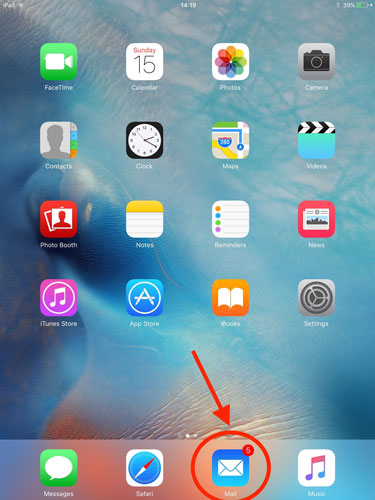
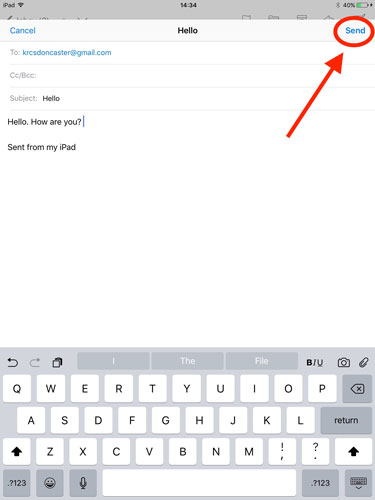
Navigate to the Mail app.
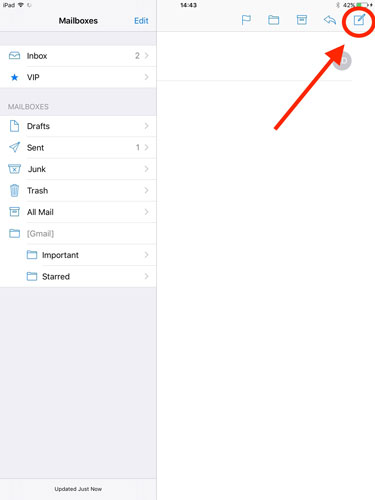
To compose an email press the pen on paper icon in the top right hand side of the app.
Enter the email address you wish to send an email to, a subject and then the actual message. After this press the ‘send’ button in the top right hand side and your email will send.
How to send a pages attachment
Navigate to the Mail app. To compose an email press the pen on paper icon in the top right hand side of the app. Enter the email address you wish to send an email to, a subject and then the actual message. To add an attachment press and hold on the screen until you see the ‘add attachment’ option or simply press the paper clip located on the right hand side of the keyboard.
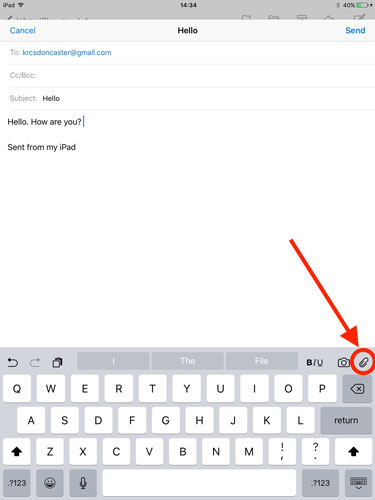
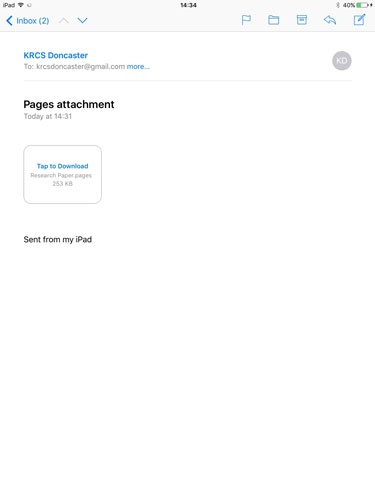
After pressing this there will be three options; Numbers, Keynote and Pages. Press whichever one you wish to attach , for example ‘Pages’, then select the document you wish to send. After pressing a document, it will be added to the email and is ready to send.
How to send an image attachment
Navigate to the Mail app. To compose an email press the pen on paper icon in the top right hand side of the app. Enter the email address you wish to send an email to, a subject and then the actual message. To add an image press and hold on the screen until you see the ‘add photo or video’ option or simply press the camera located on the right hand side of the keyboard.
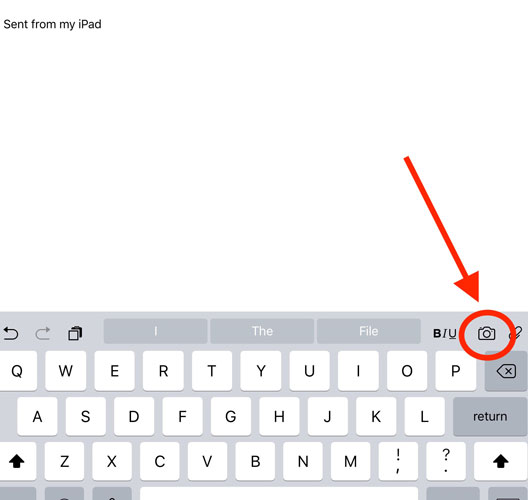
After pressing this you will be presented with all of your photo libraries, select the one containing the image you wish to send.
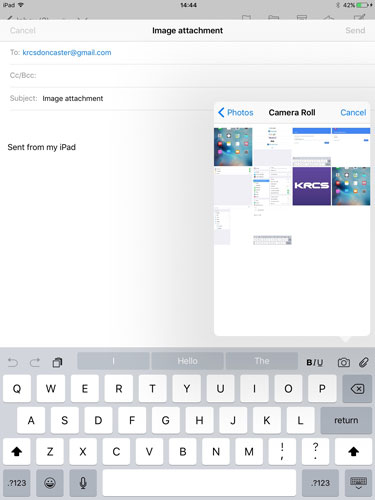
Find the image you wish to send and when you locate the image, select it by tapping on it, you will then be shown a larger version of the image.
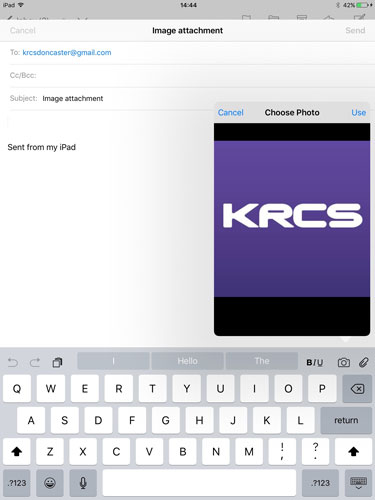
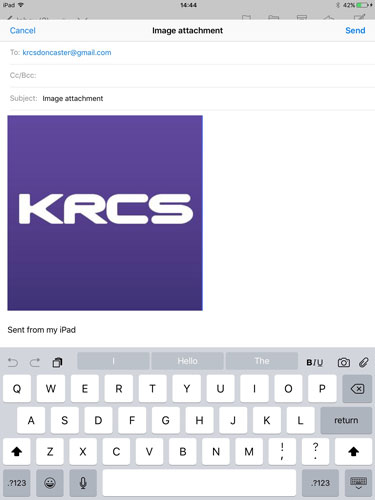
To send it, press ‘use’ in the top right hand side of the selection. This will add the image to the email and will be ready to send.
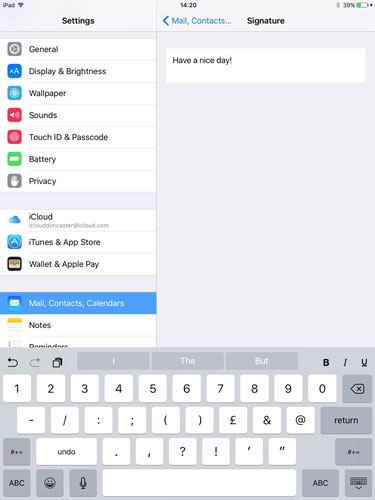
How to add a signature to your emails
To add a signature to your emails navigate to the settings app by pressing the Settings app icon. When in the settings scroll down until you see the ‘Mail, Contacts, Calendars’ tab, tap it and look for the ‘Signature’ label by scrolling down through the menu on the right side of the screen. Tap the “Signature” option and on this page, type in the box what ever you would like your email signature to be. For our example, ‘Have a great day!’.
After typing this you can back out of settings and your signature will have been set, saving you a lot of time if you frequently sign-off your emails in a particular way.
Follow us on Twitter.
Email us at info@krcs.co.uk
Call us on 0115 9851797
No Comments yet. be the first to comment.