How to prepare your Apple iOS device for service
In this article, we take you through preparation for iPad or iPhone repairs. We will explain different methods on how to back up your personal data, as well as how to turn off the ‘Find My’ service.
When you bring your iPad or iPhone in for repair, you might be asked to prepare your device before the appointment.
If you haven't got an appointment yet, you can book one here.
Here are three things we recommend doing before a service appointment:
- Back up your iPad or iPhone to iCloud or locally.
- Turn off 'Find My' service.
- Update your device to the latest version of iOS/iPadOS.
Back up your iPhone or iPad to iCloud, Mac or a Windows PC.
One of the first things you’ll want to make sure of is to have all your personal information backed up to either iCloud, Mac or a Windows PC. This is so you don’t lose any data in the process and have the most up-to-date information when you collect your device back from service.
There are three different methods you can use to back up your iPad or iPhone:
- iCloud - the most convenient backup solution. If you want to back up your device wirelessly without any need of external hardware, choose this method. For this to work, you will need to be connected to a Wi-Fi network.
- Mac - if you prefer to create a local backup instead, you can back up your data to your Mac. For this you will need to connect your device to Mac via USB cable.
- Windows PC - if you don’t have a Mac, and don’t want to use iCloud, you can also use iTunes Backup on Windows. For this, you would need to connect your device via USB cable and have iTunes installed on your PC.
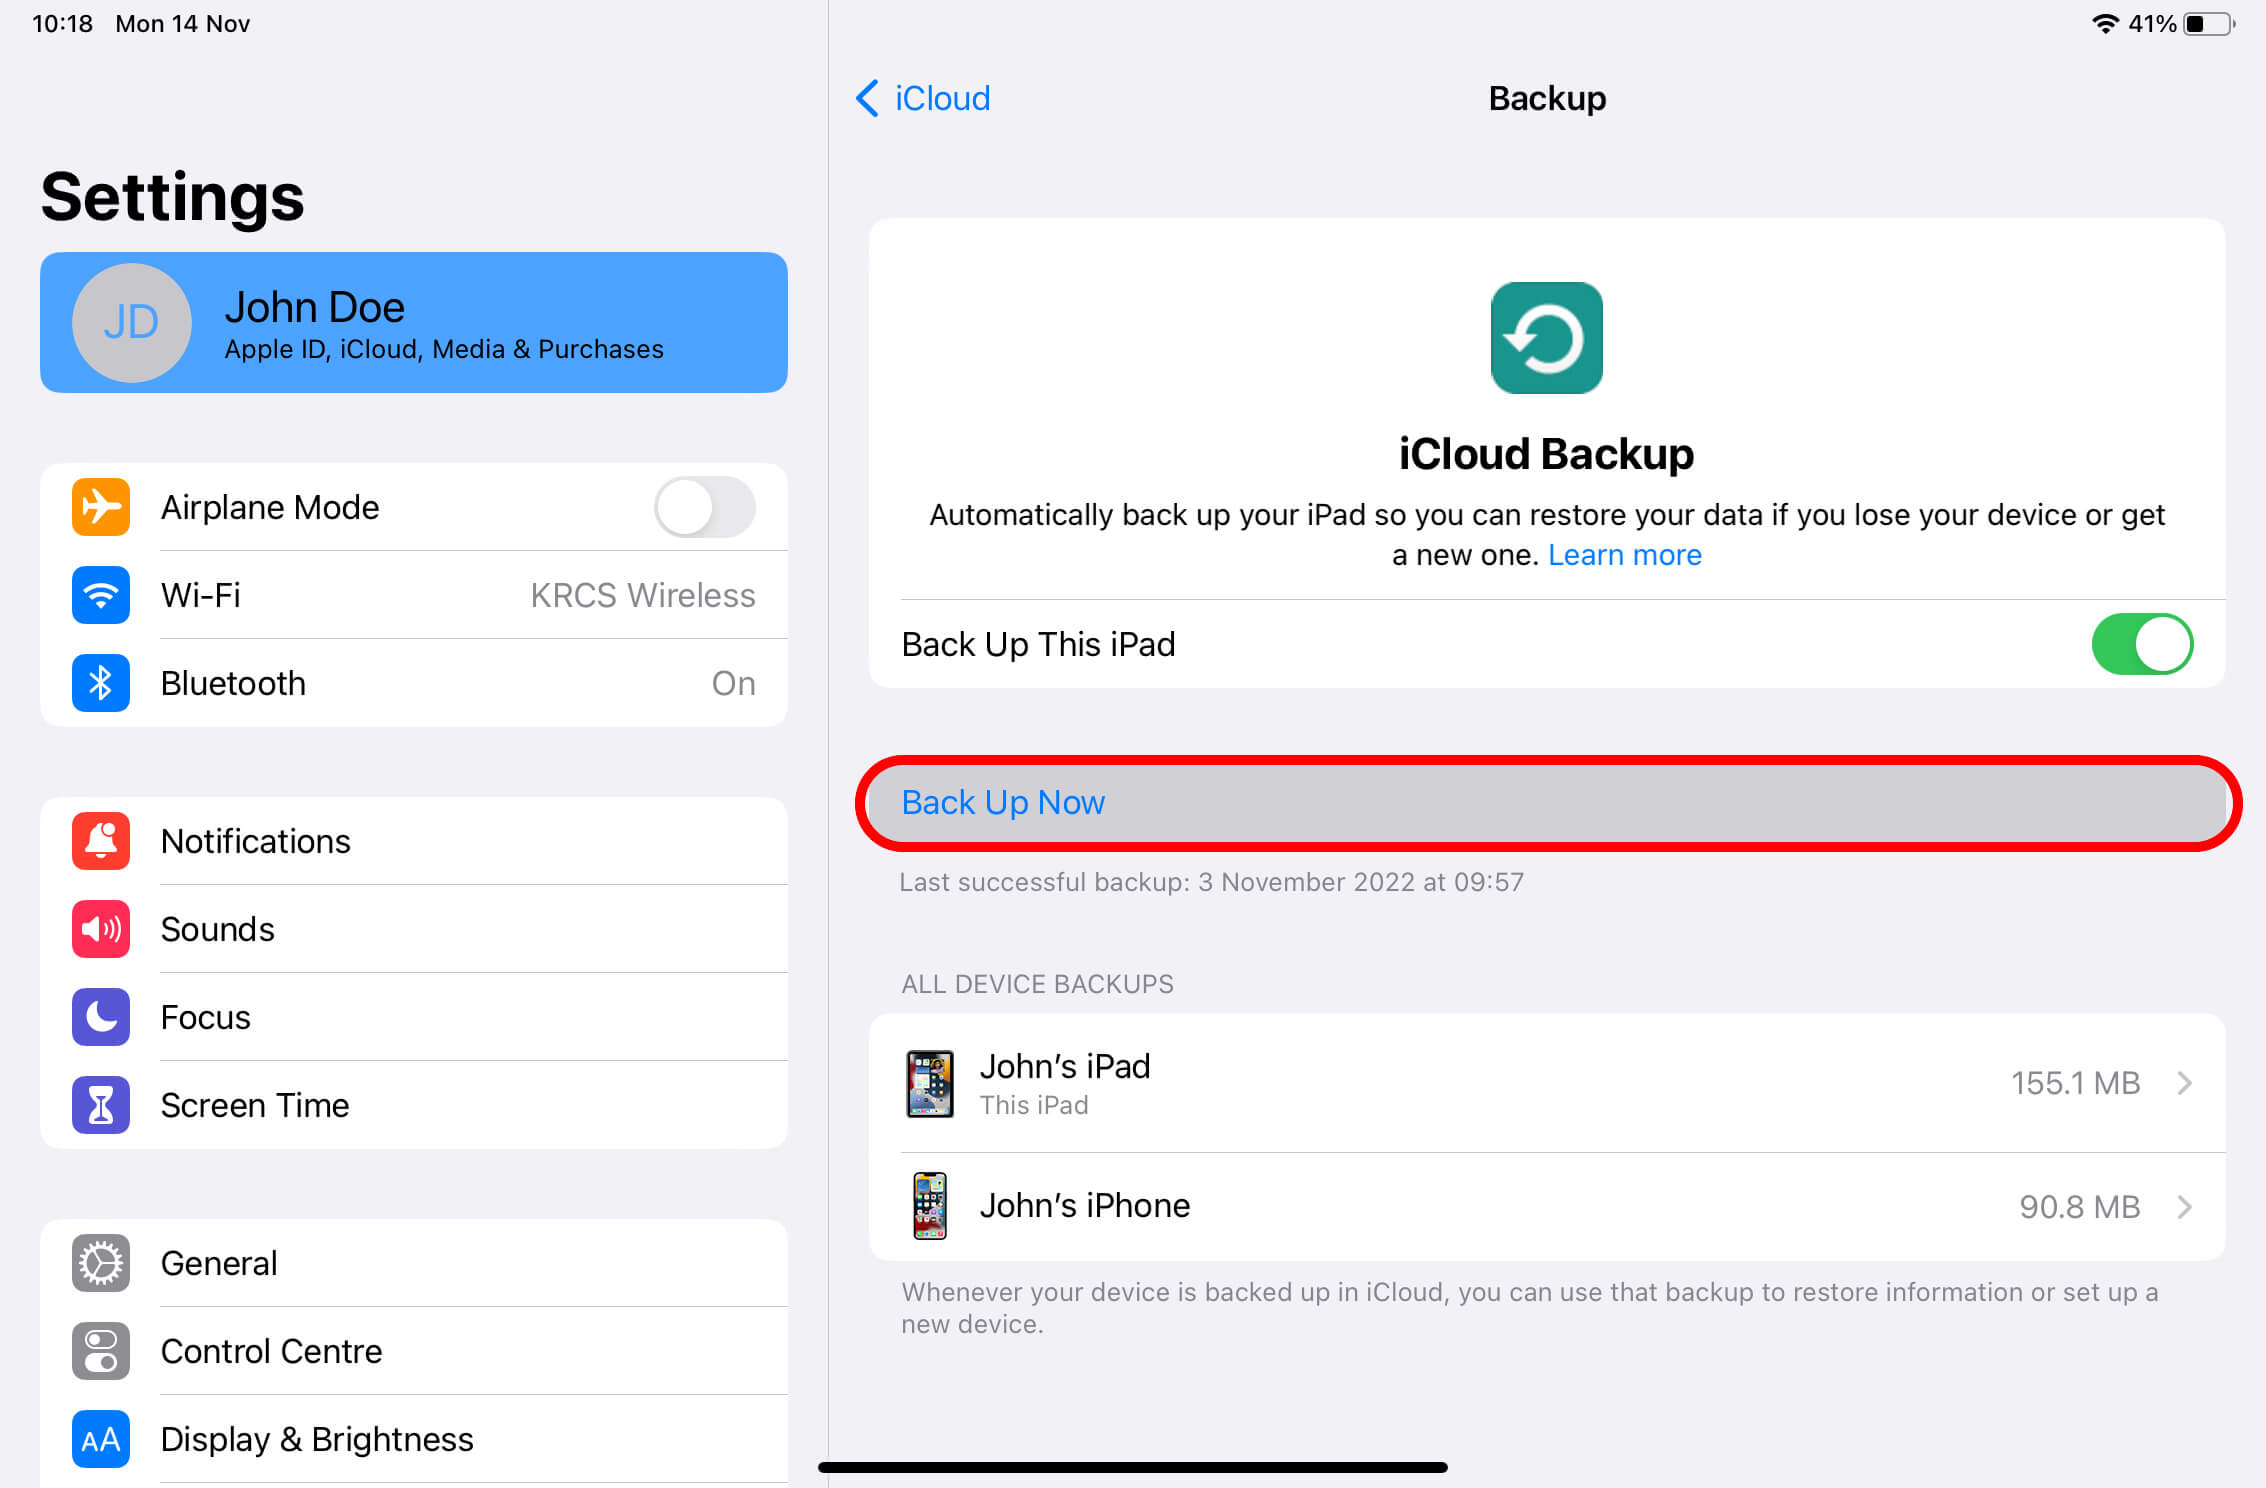
To back up your iPhone or iPad to iCloud:
- Connect your iPad or iPhone to a Wi-Fi network.
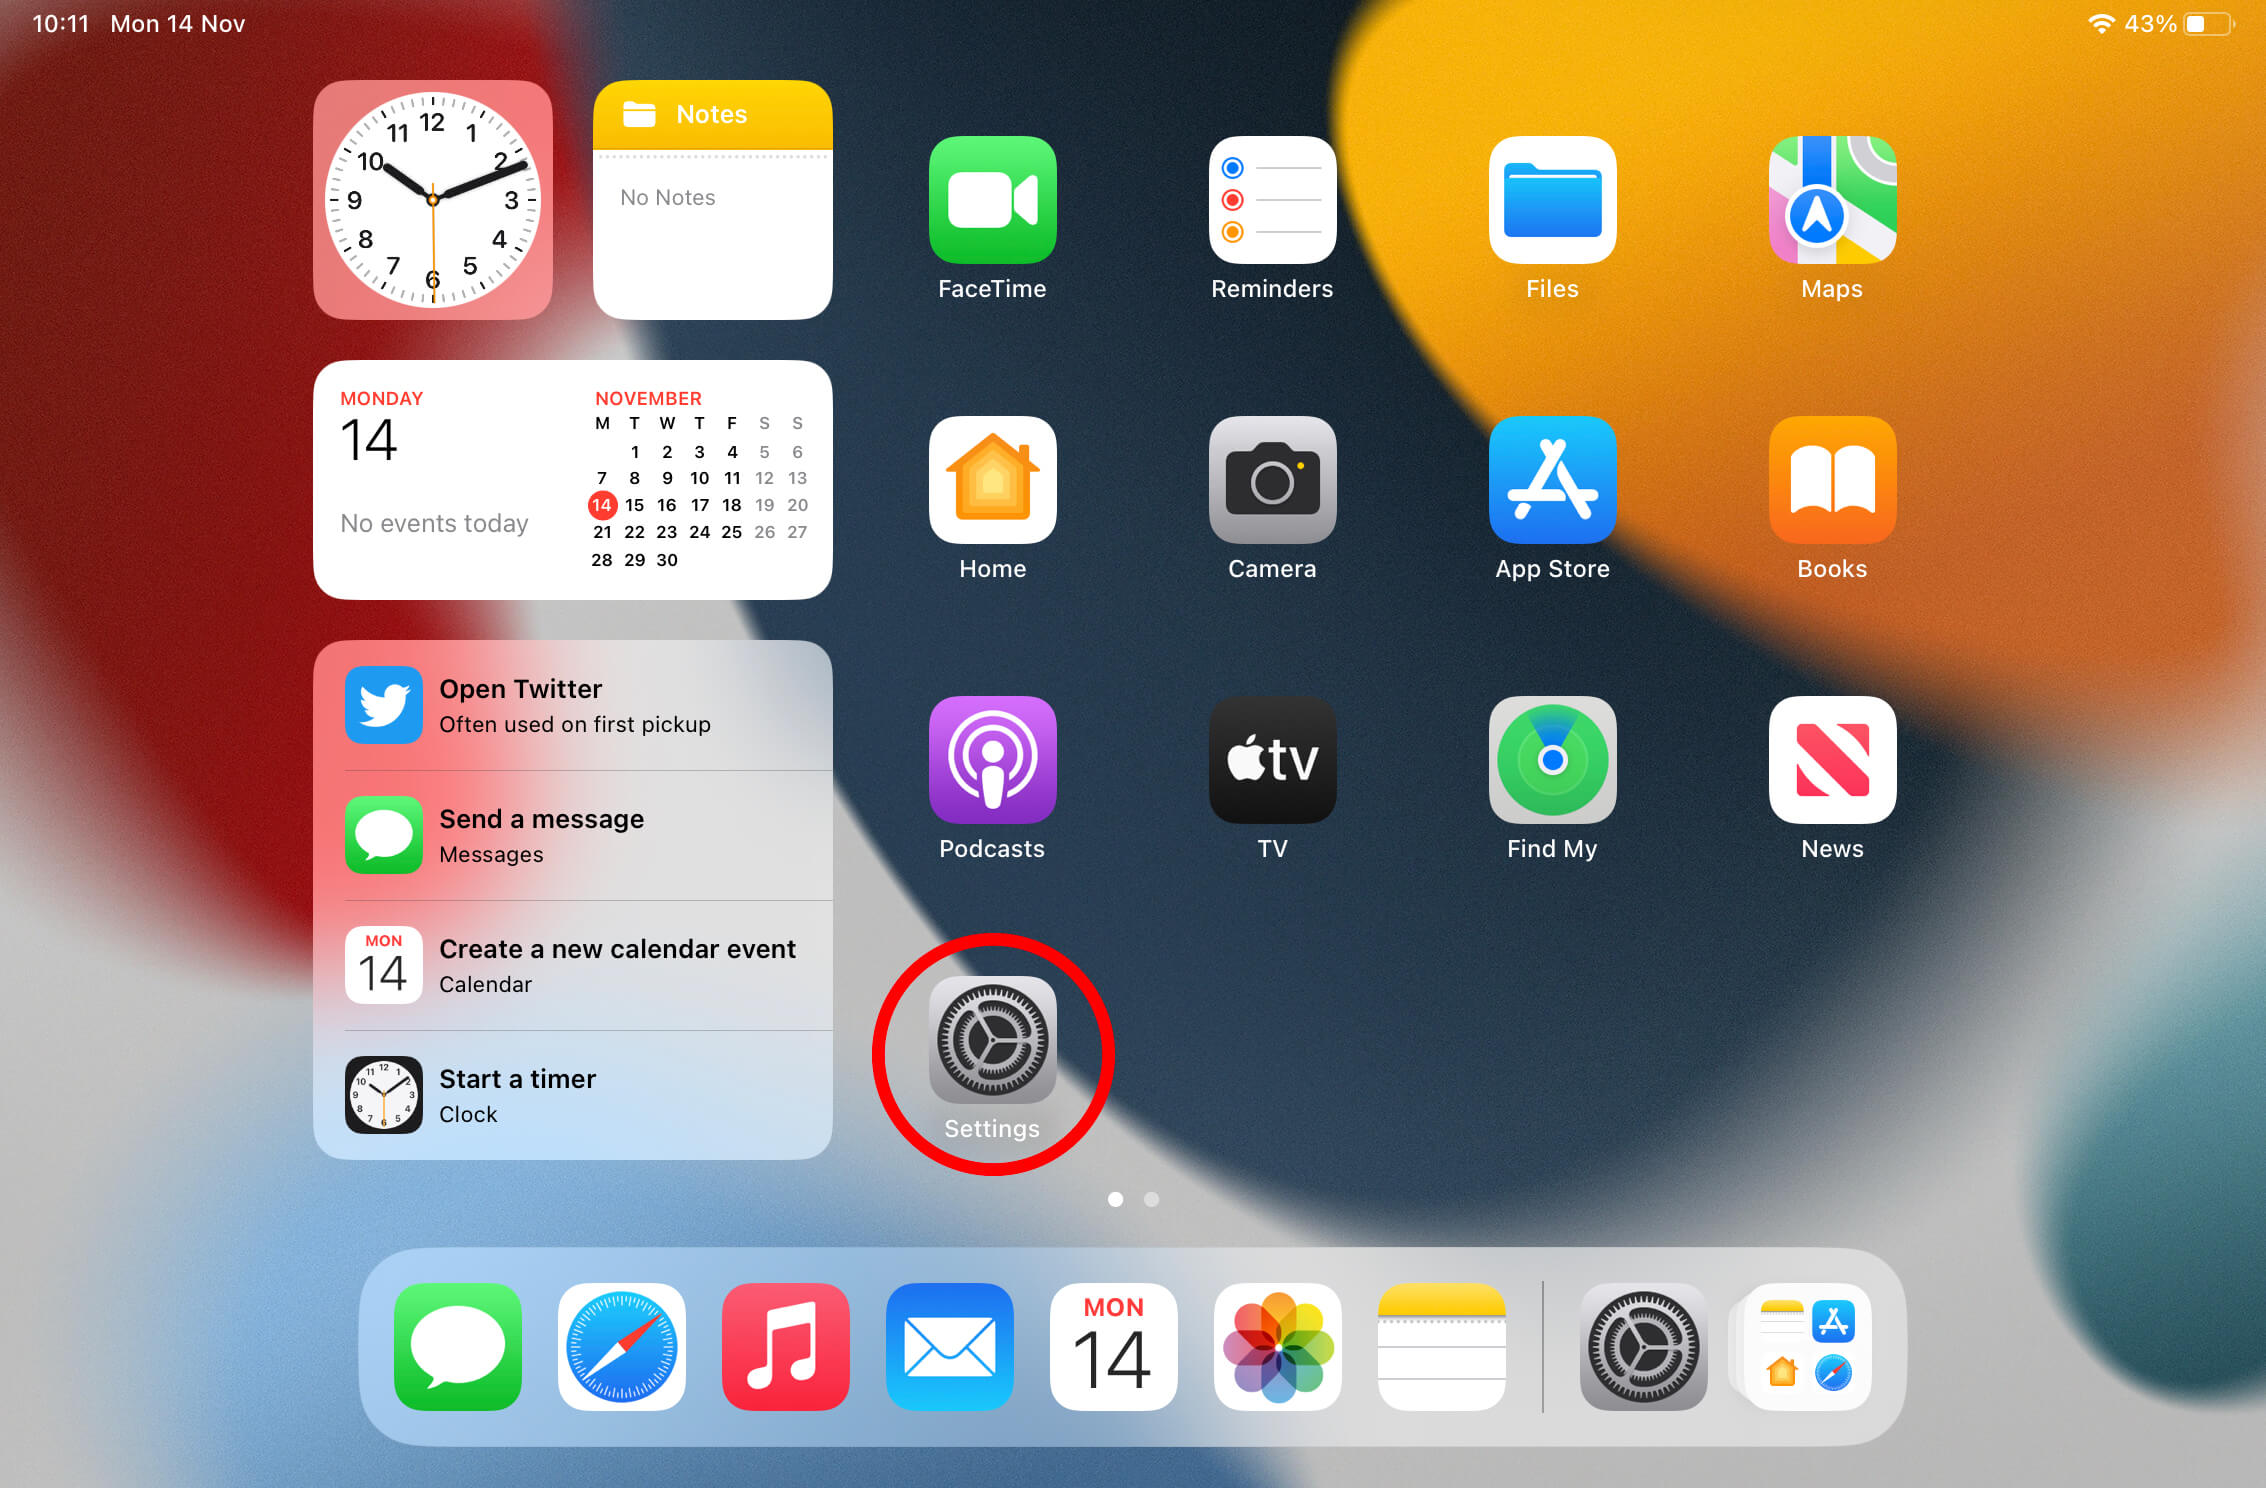
- Go to ‘Settings’.
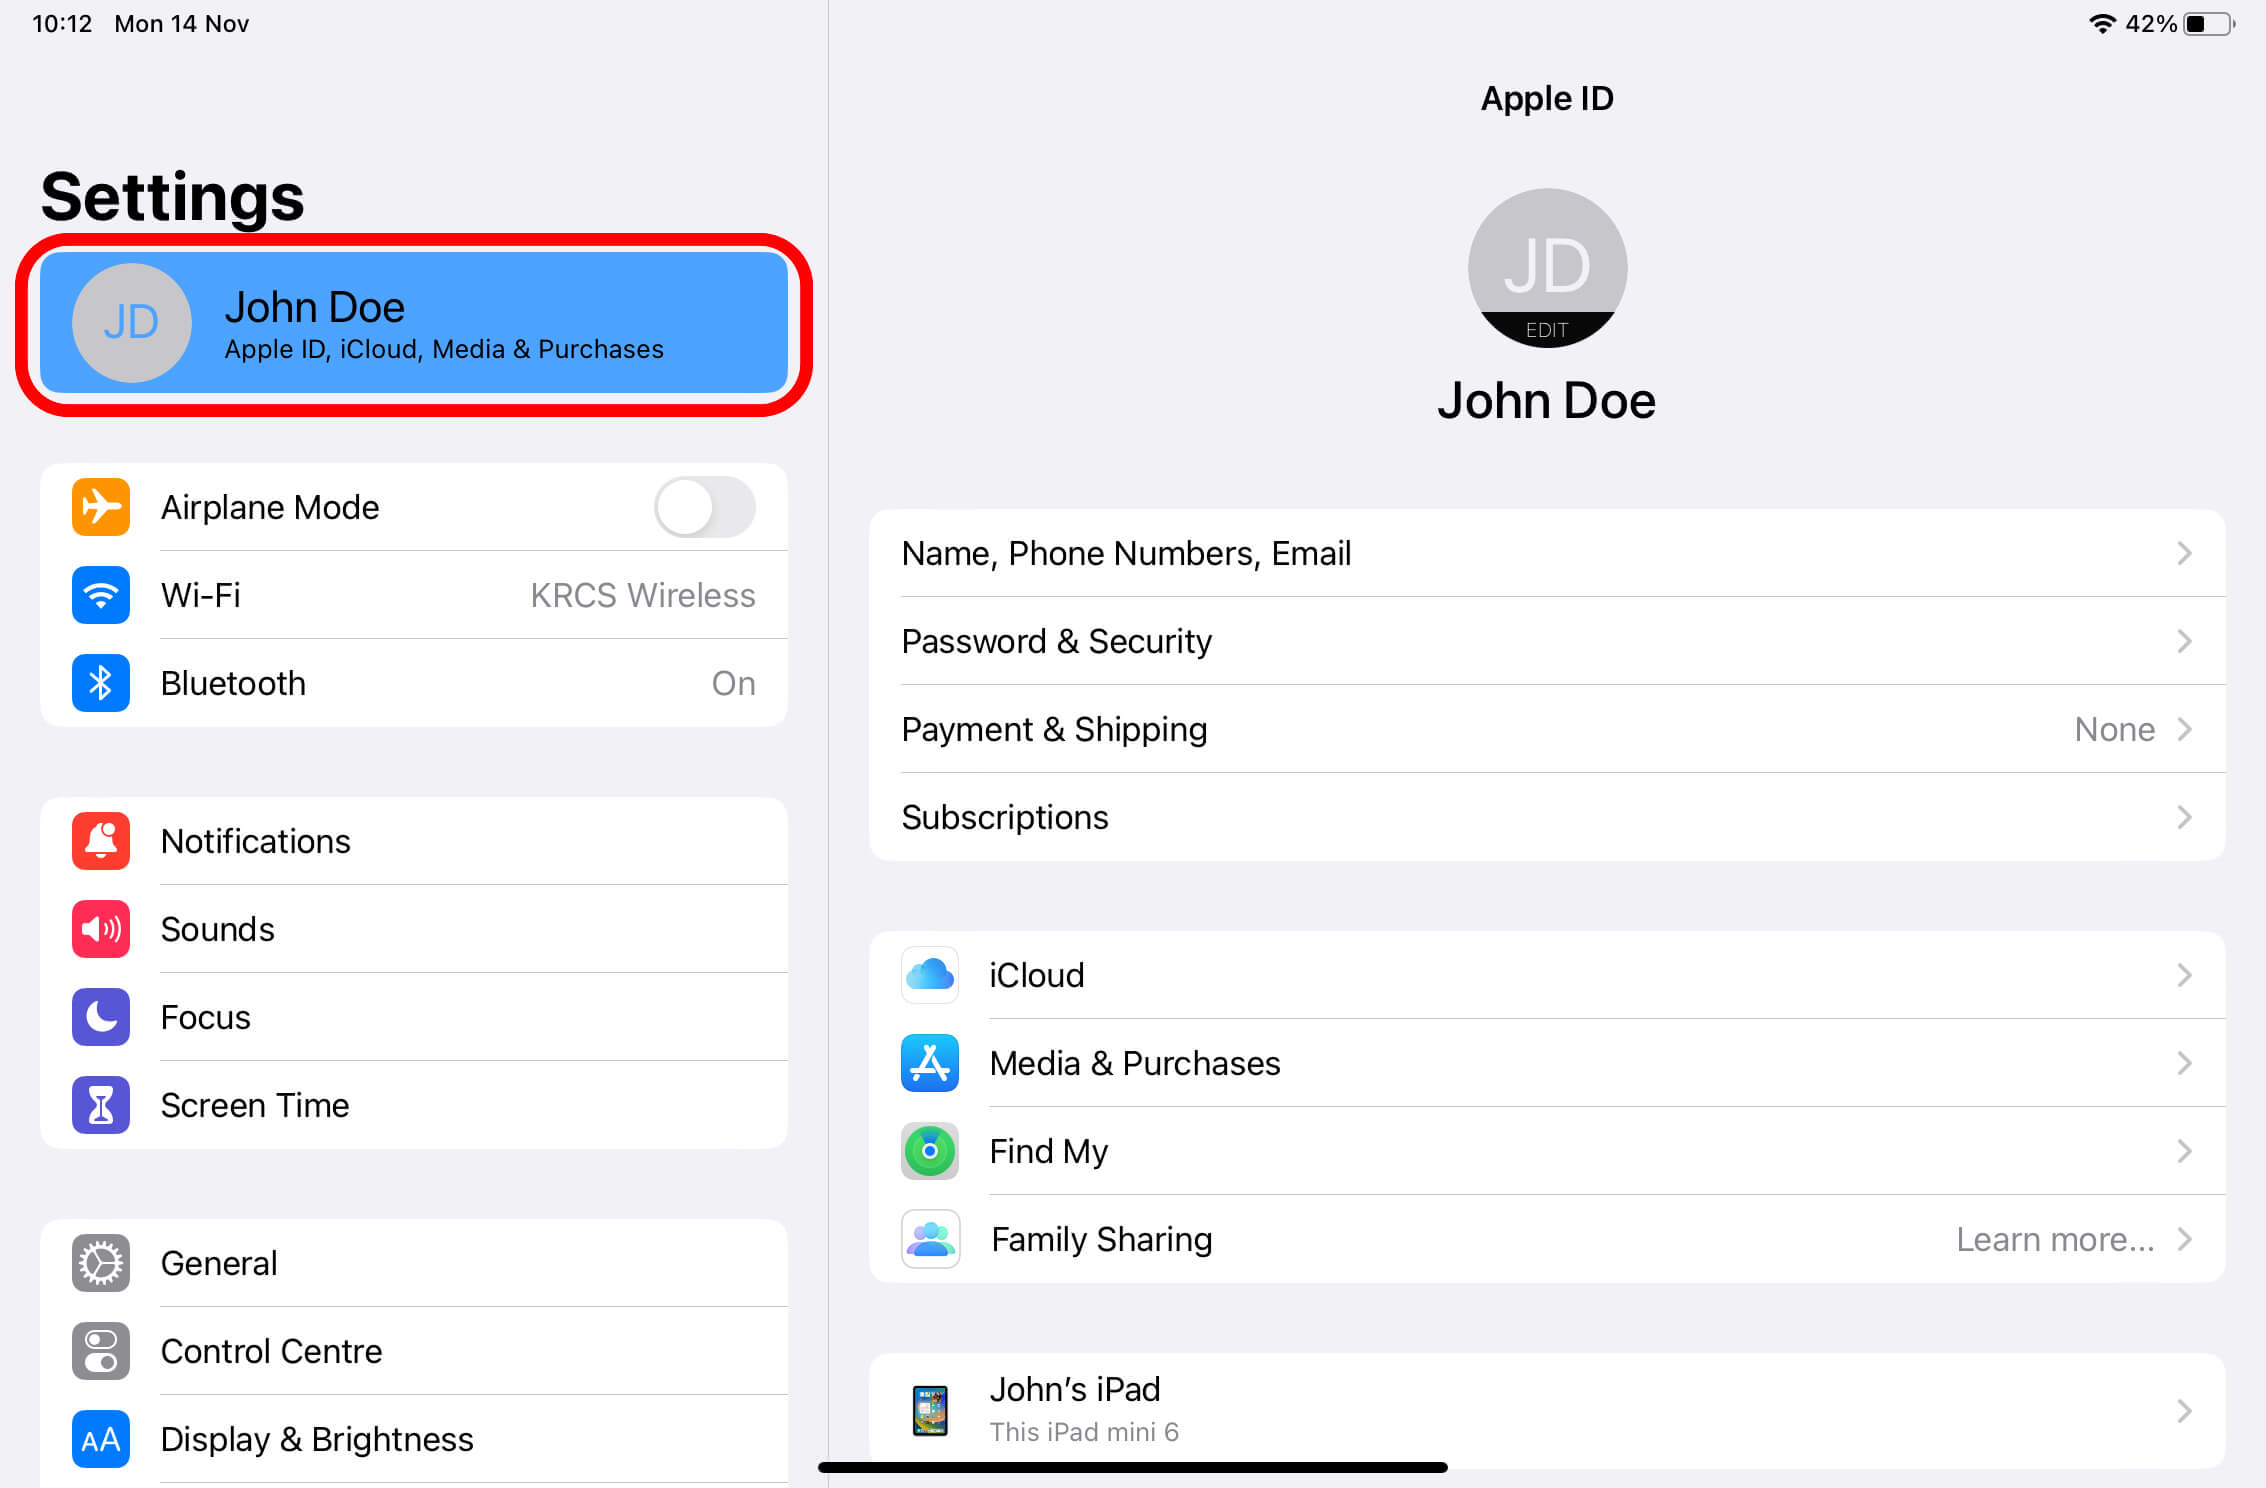
- Tap on your name at the top.
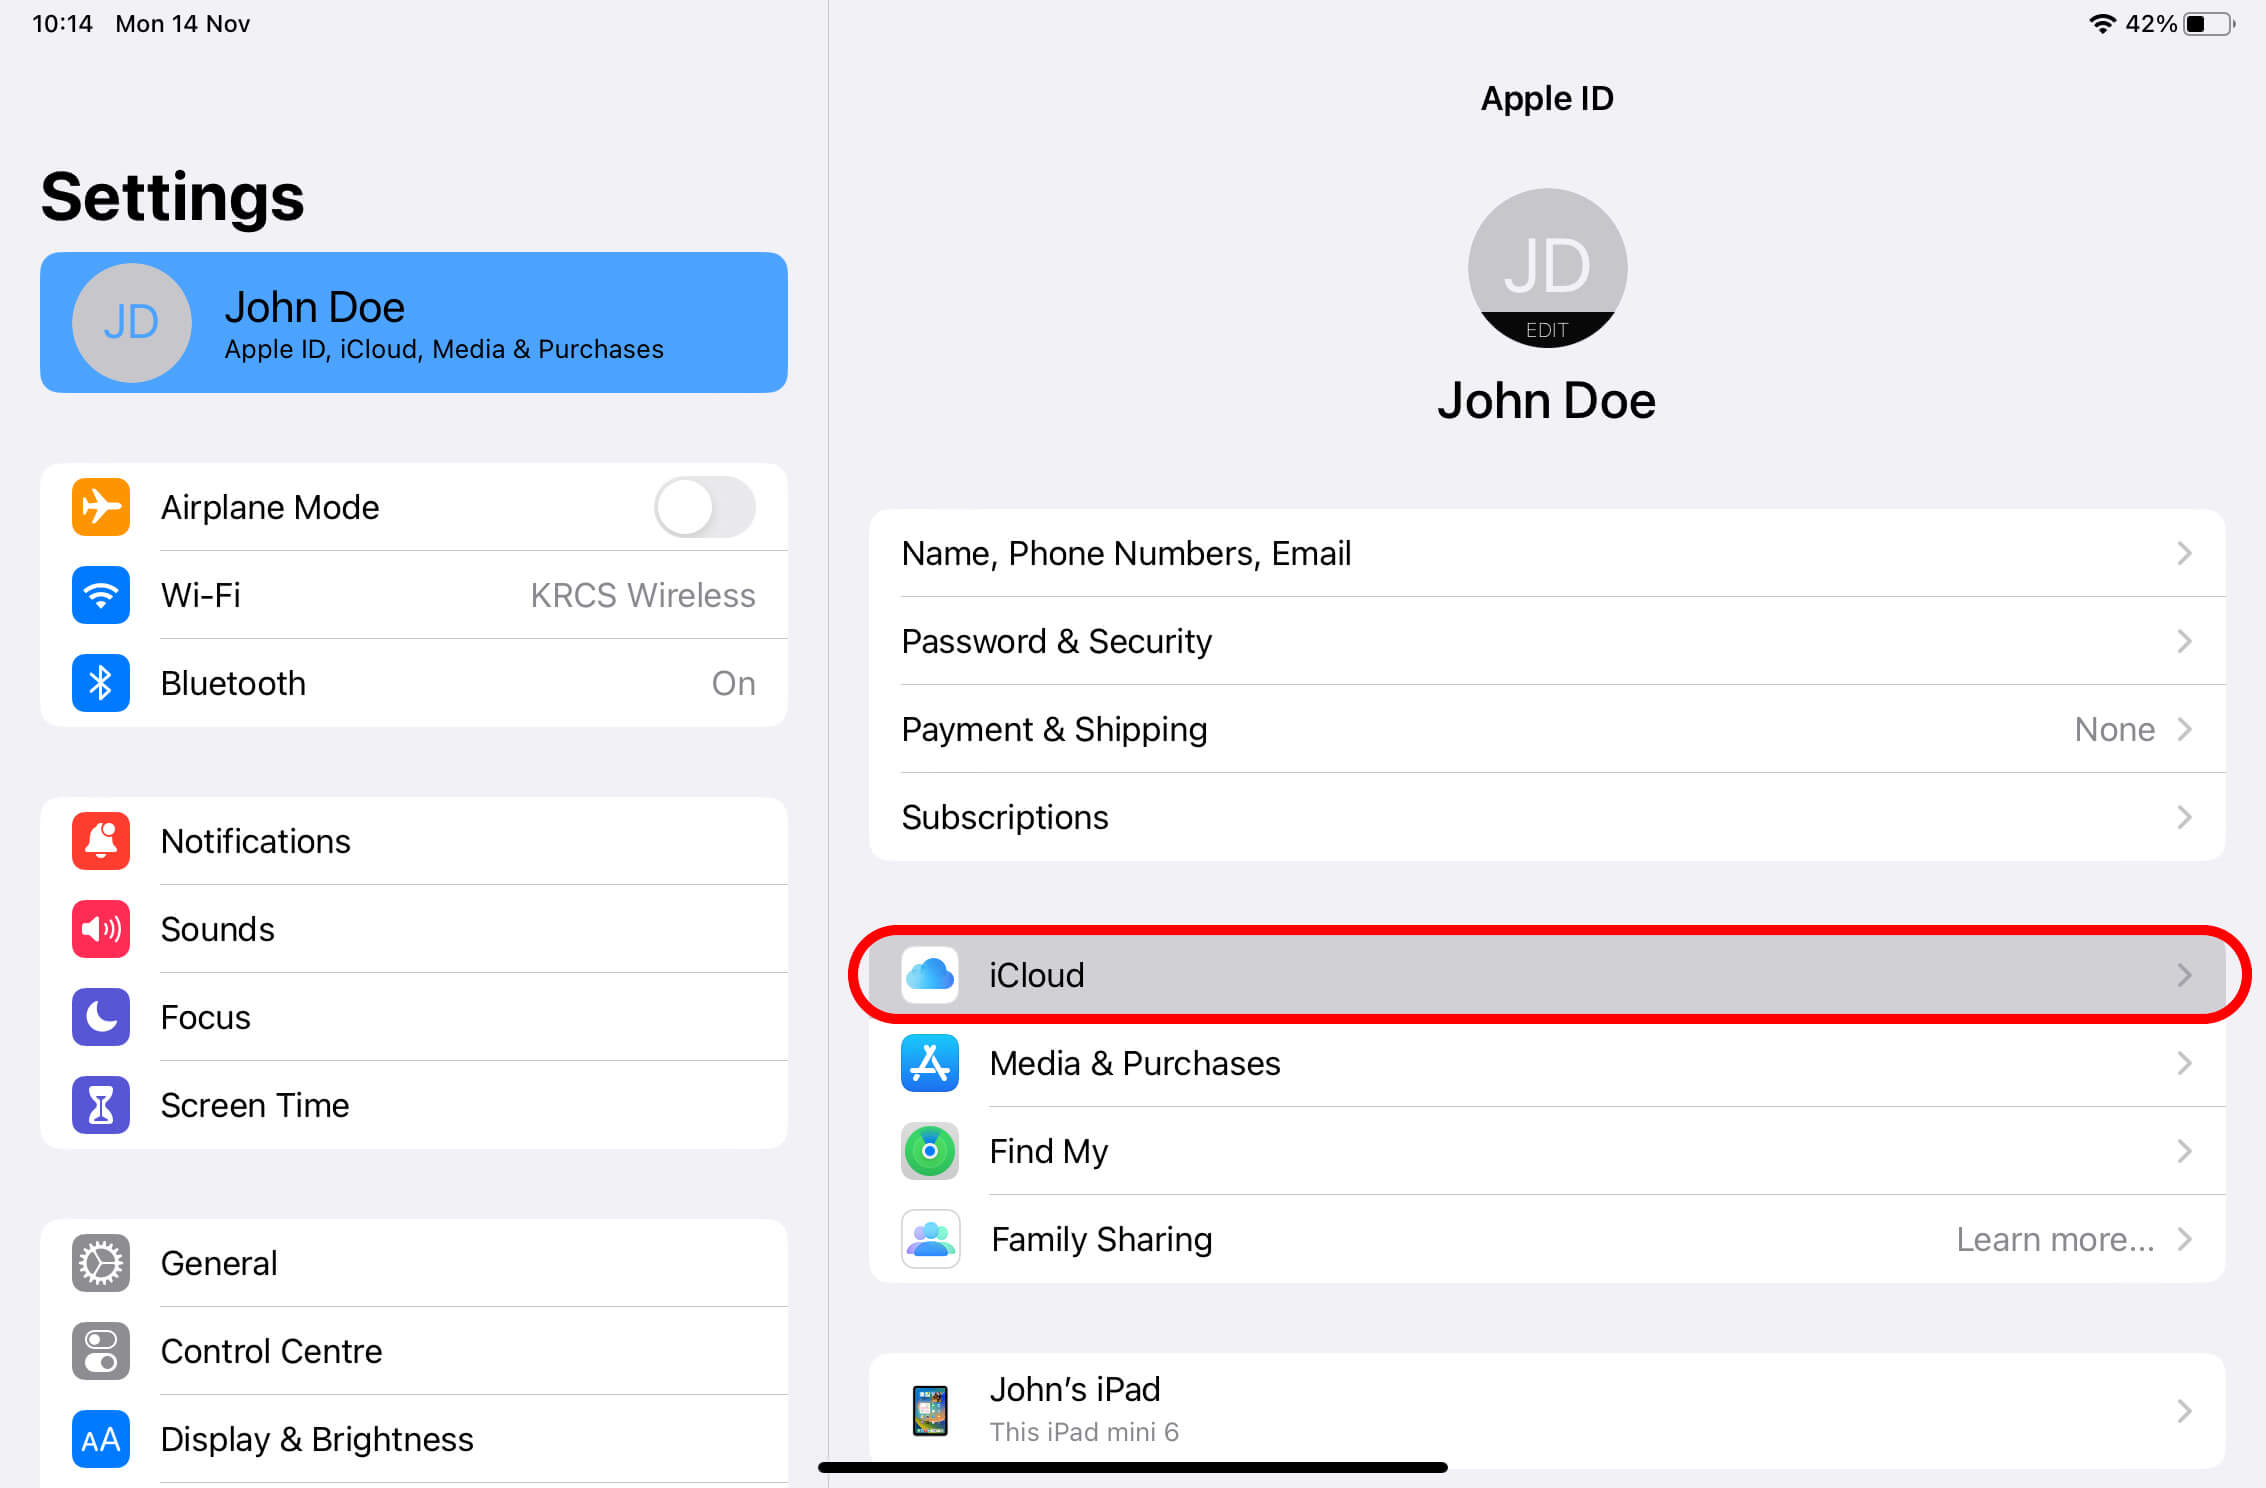
- Tap ‘iCloud’.
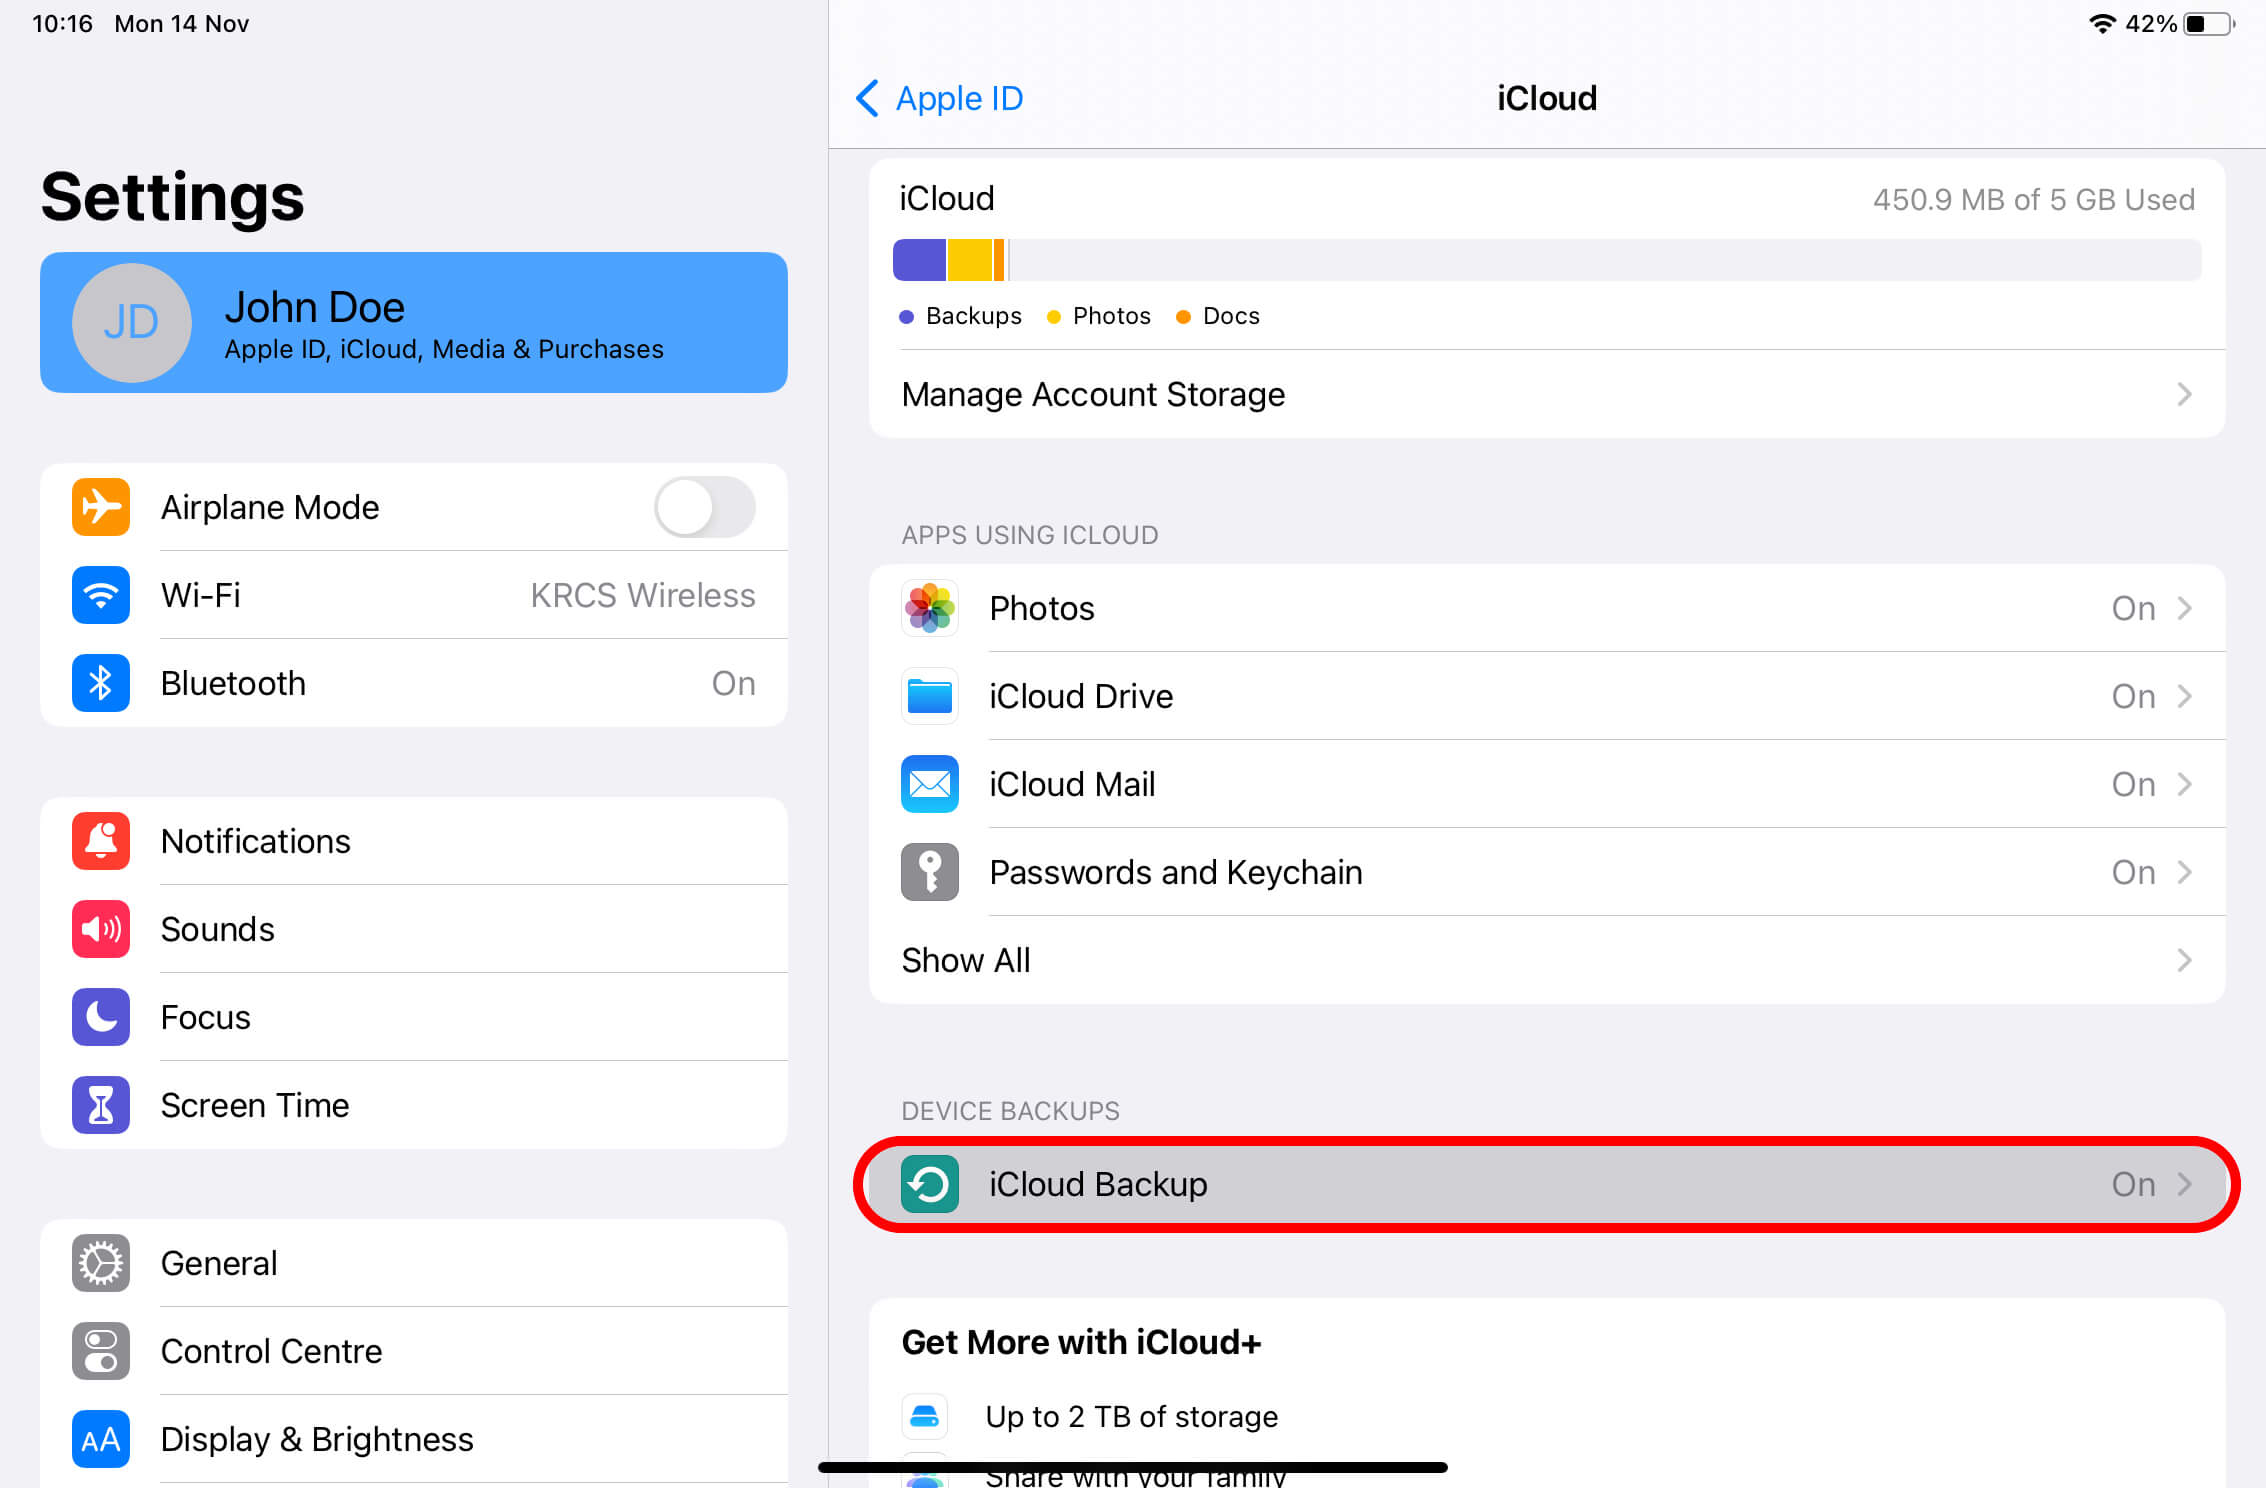
- Tap ‘iCloud Backup’.
- Tap ‘Back Up Now’.
- When the backup has been completed, you will see the latest backup time and date underneath the ‘Back Up Now’ button.

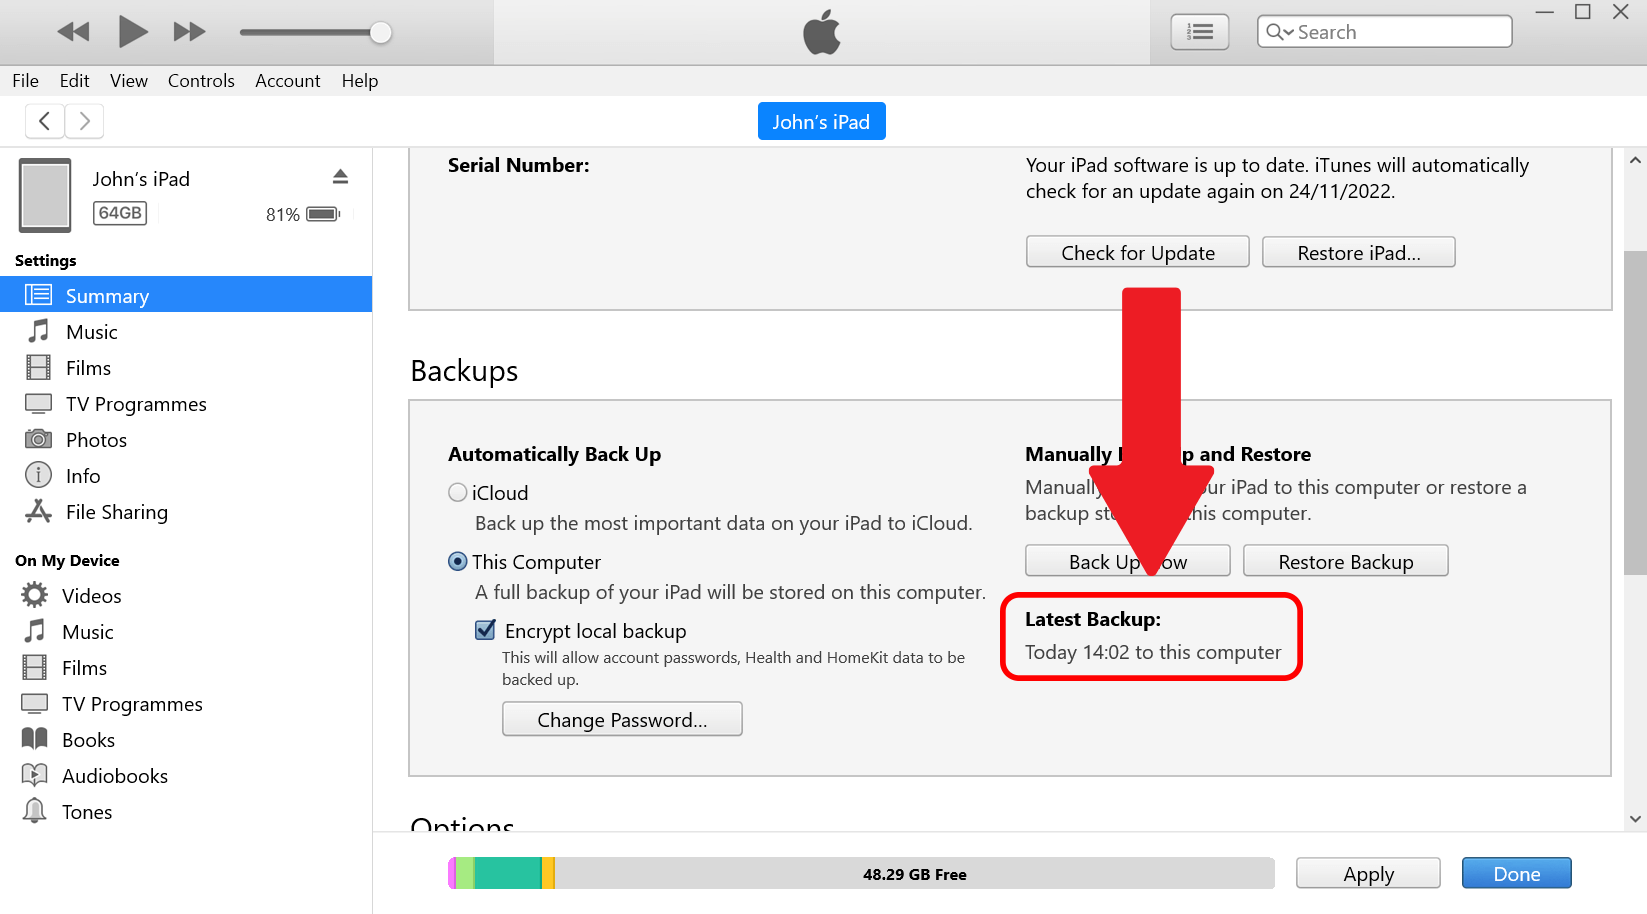
To back up your iPhone or iPad to a Mac:
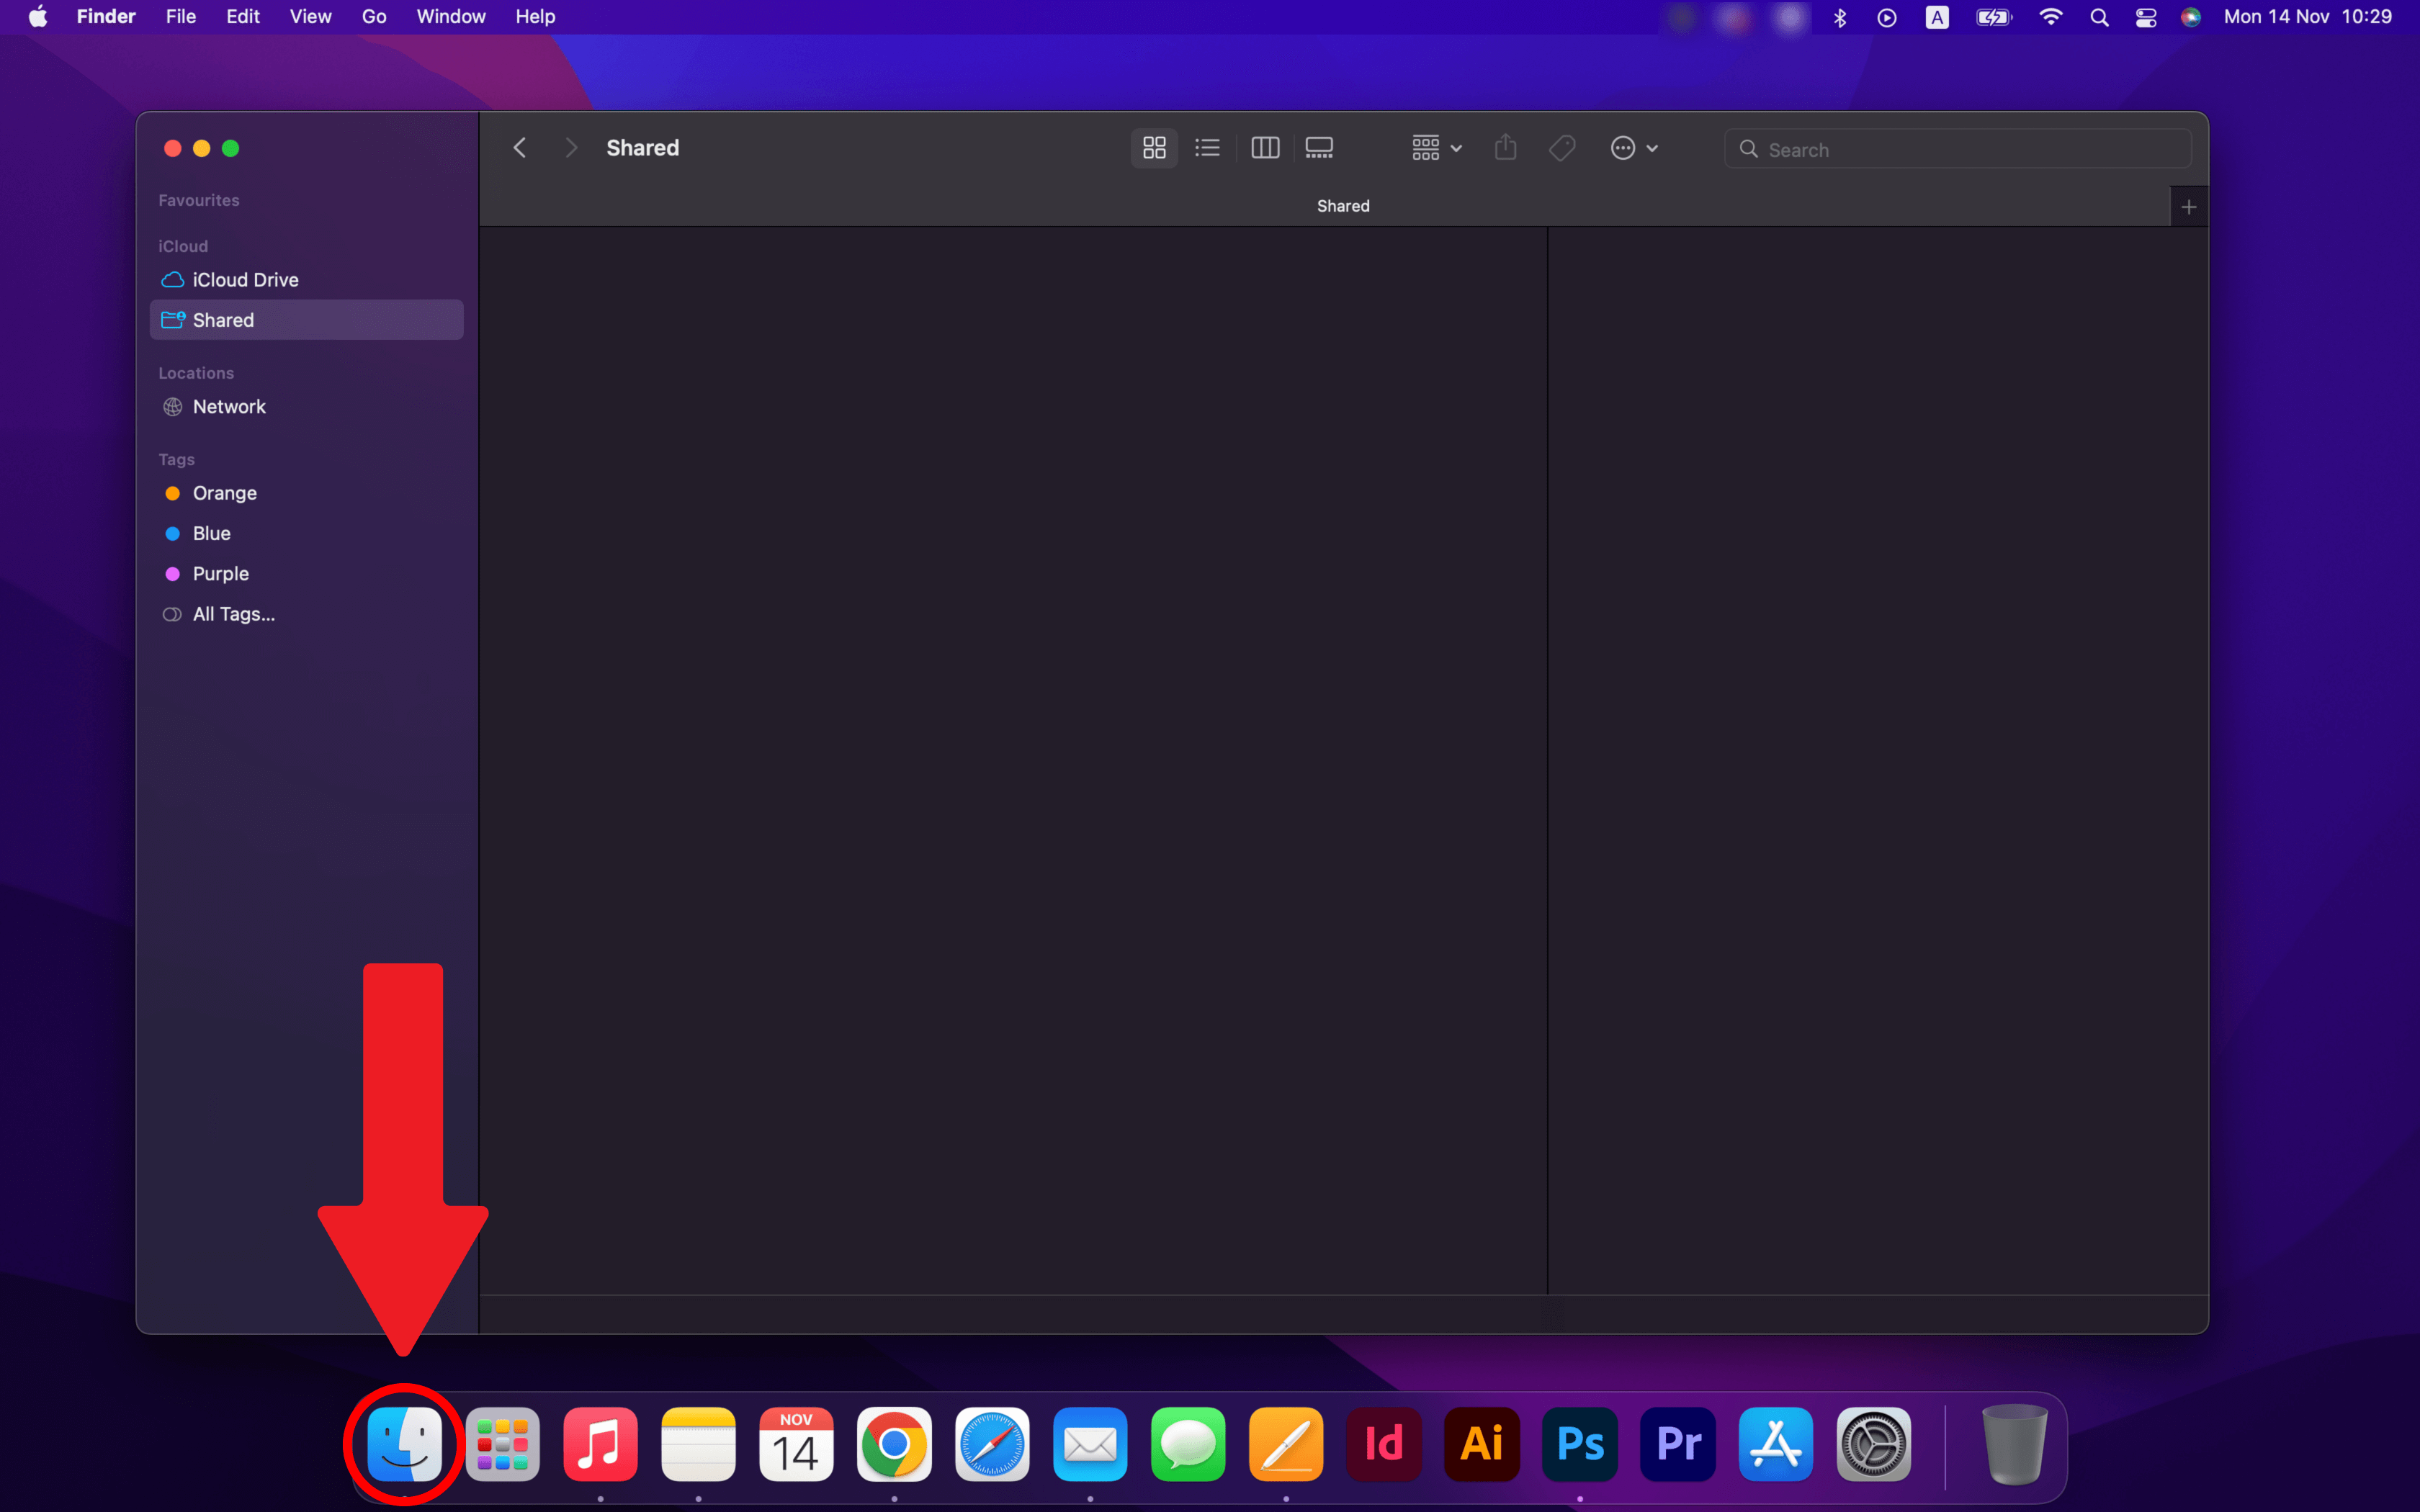
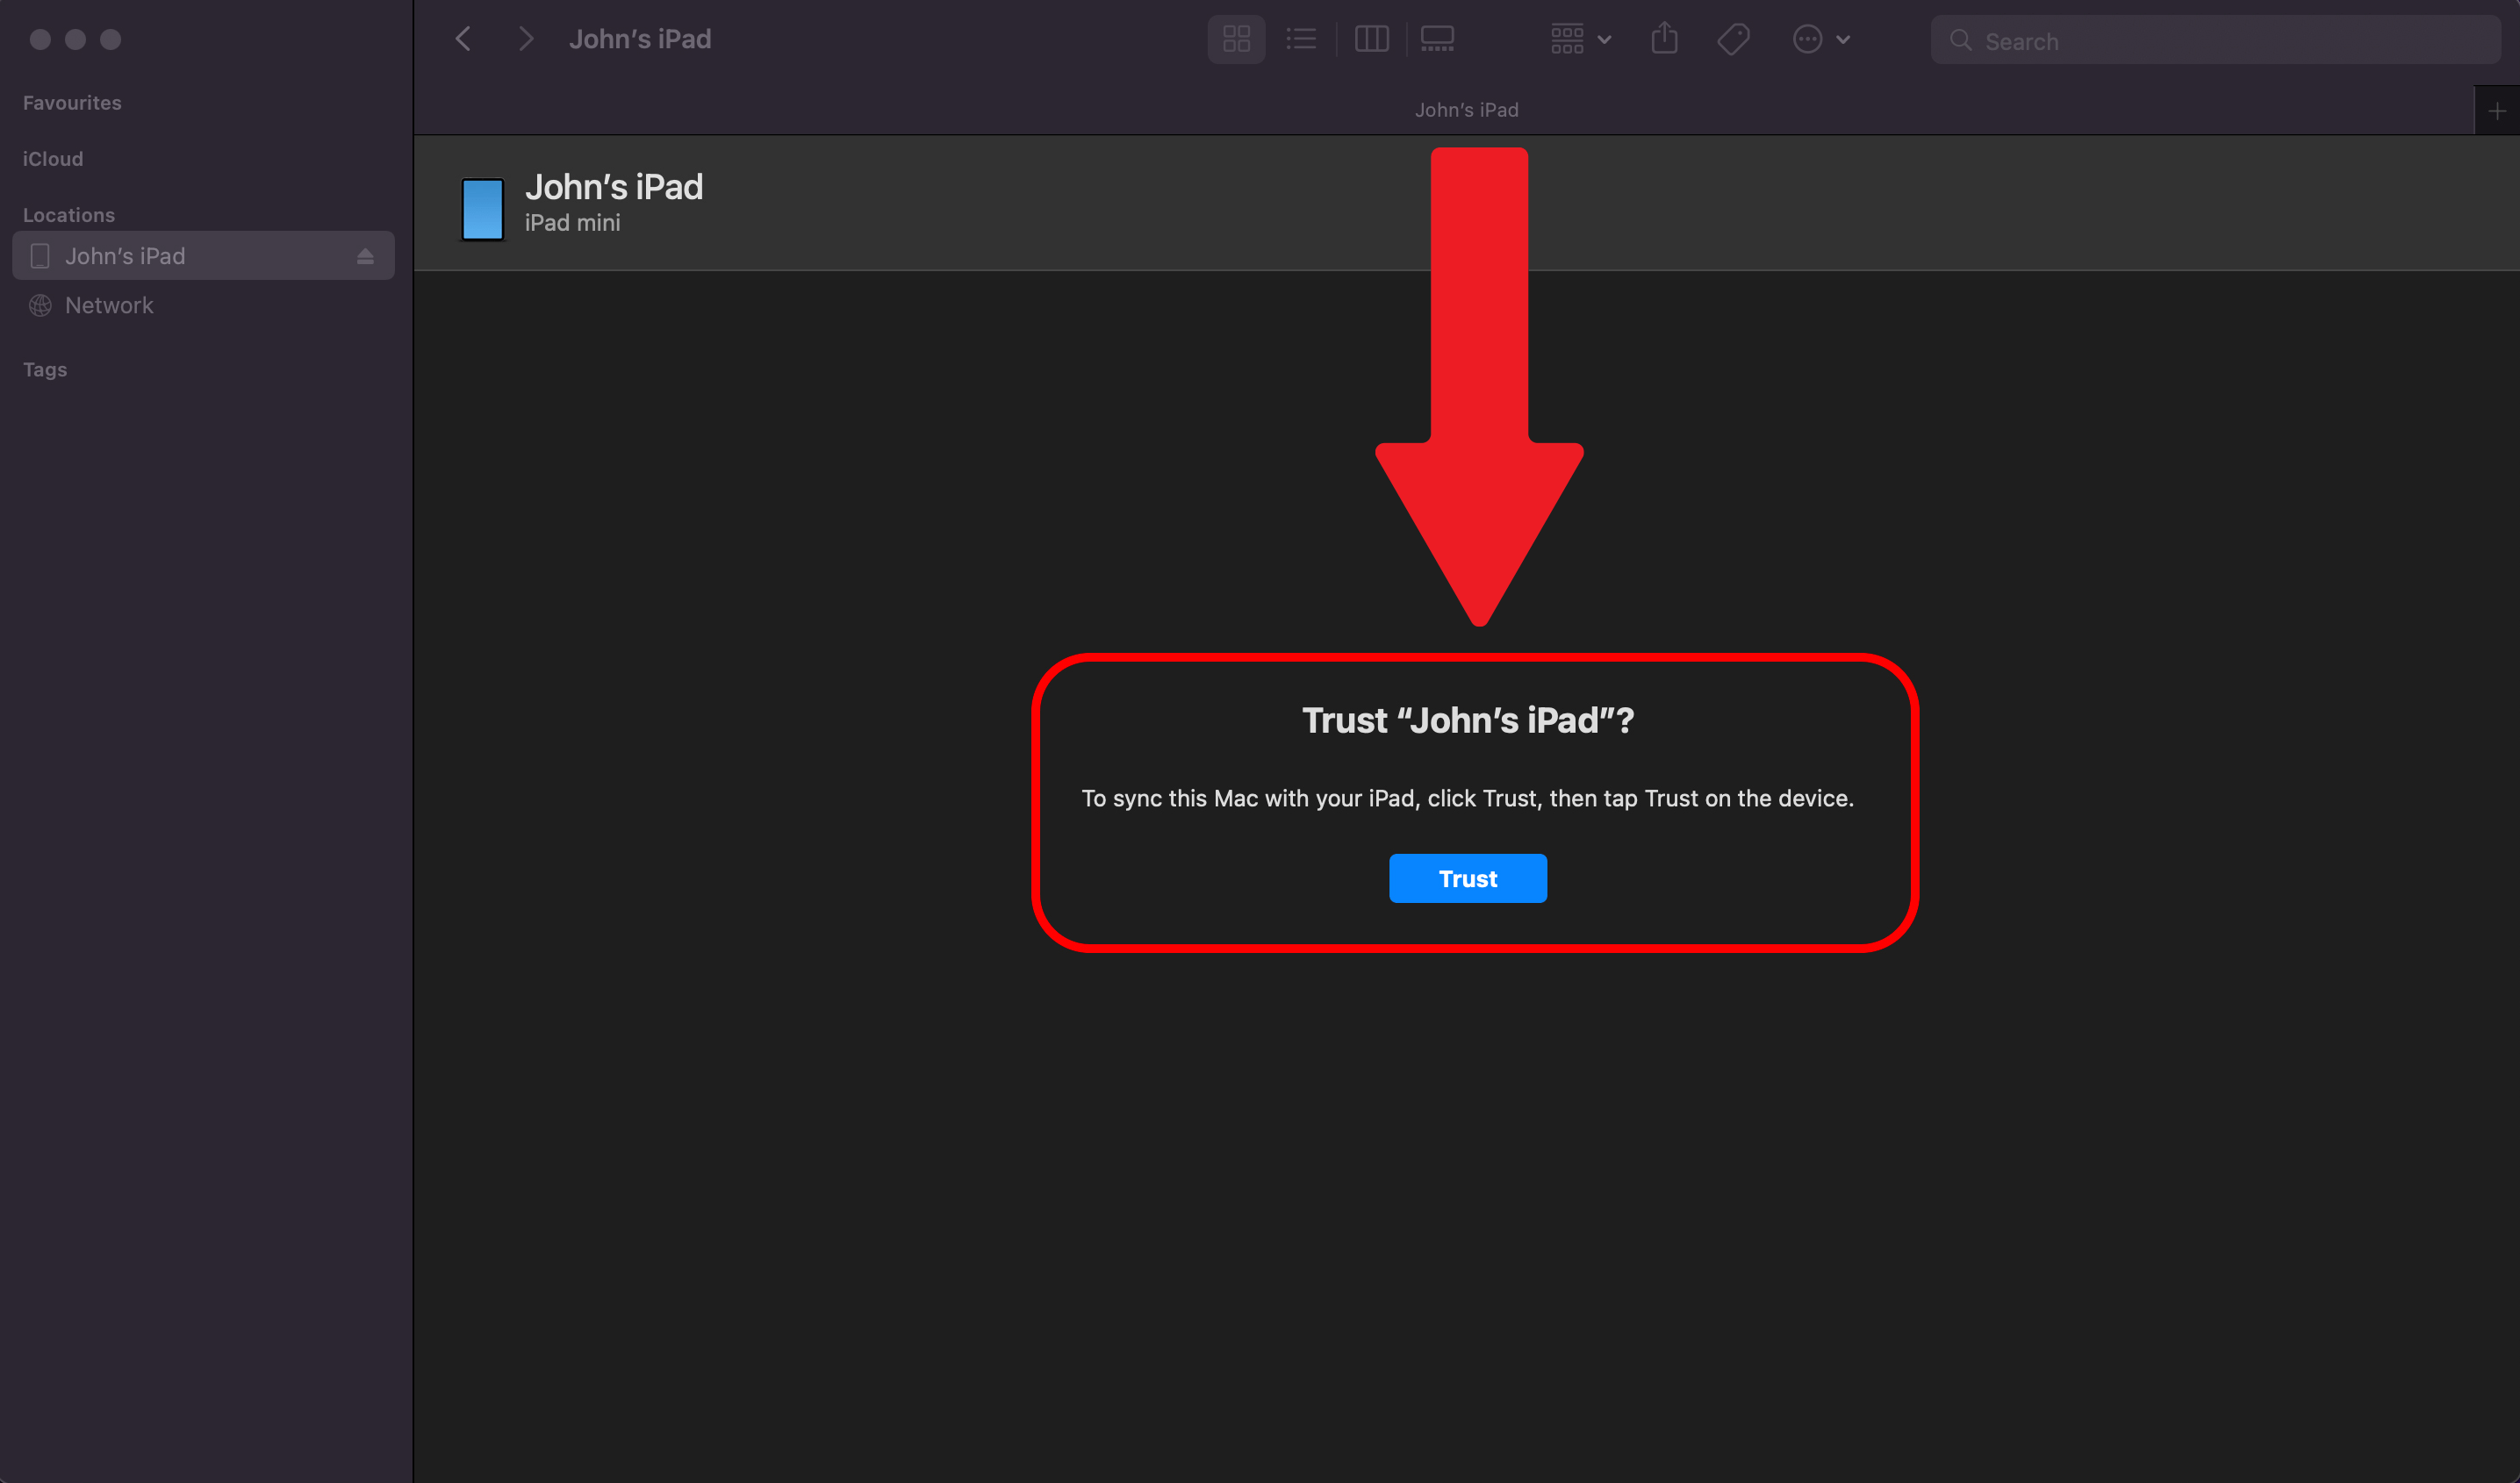
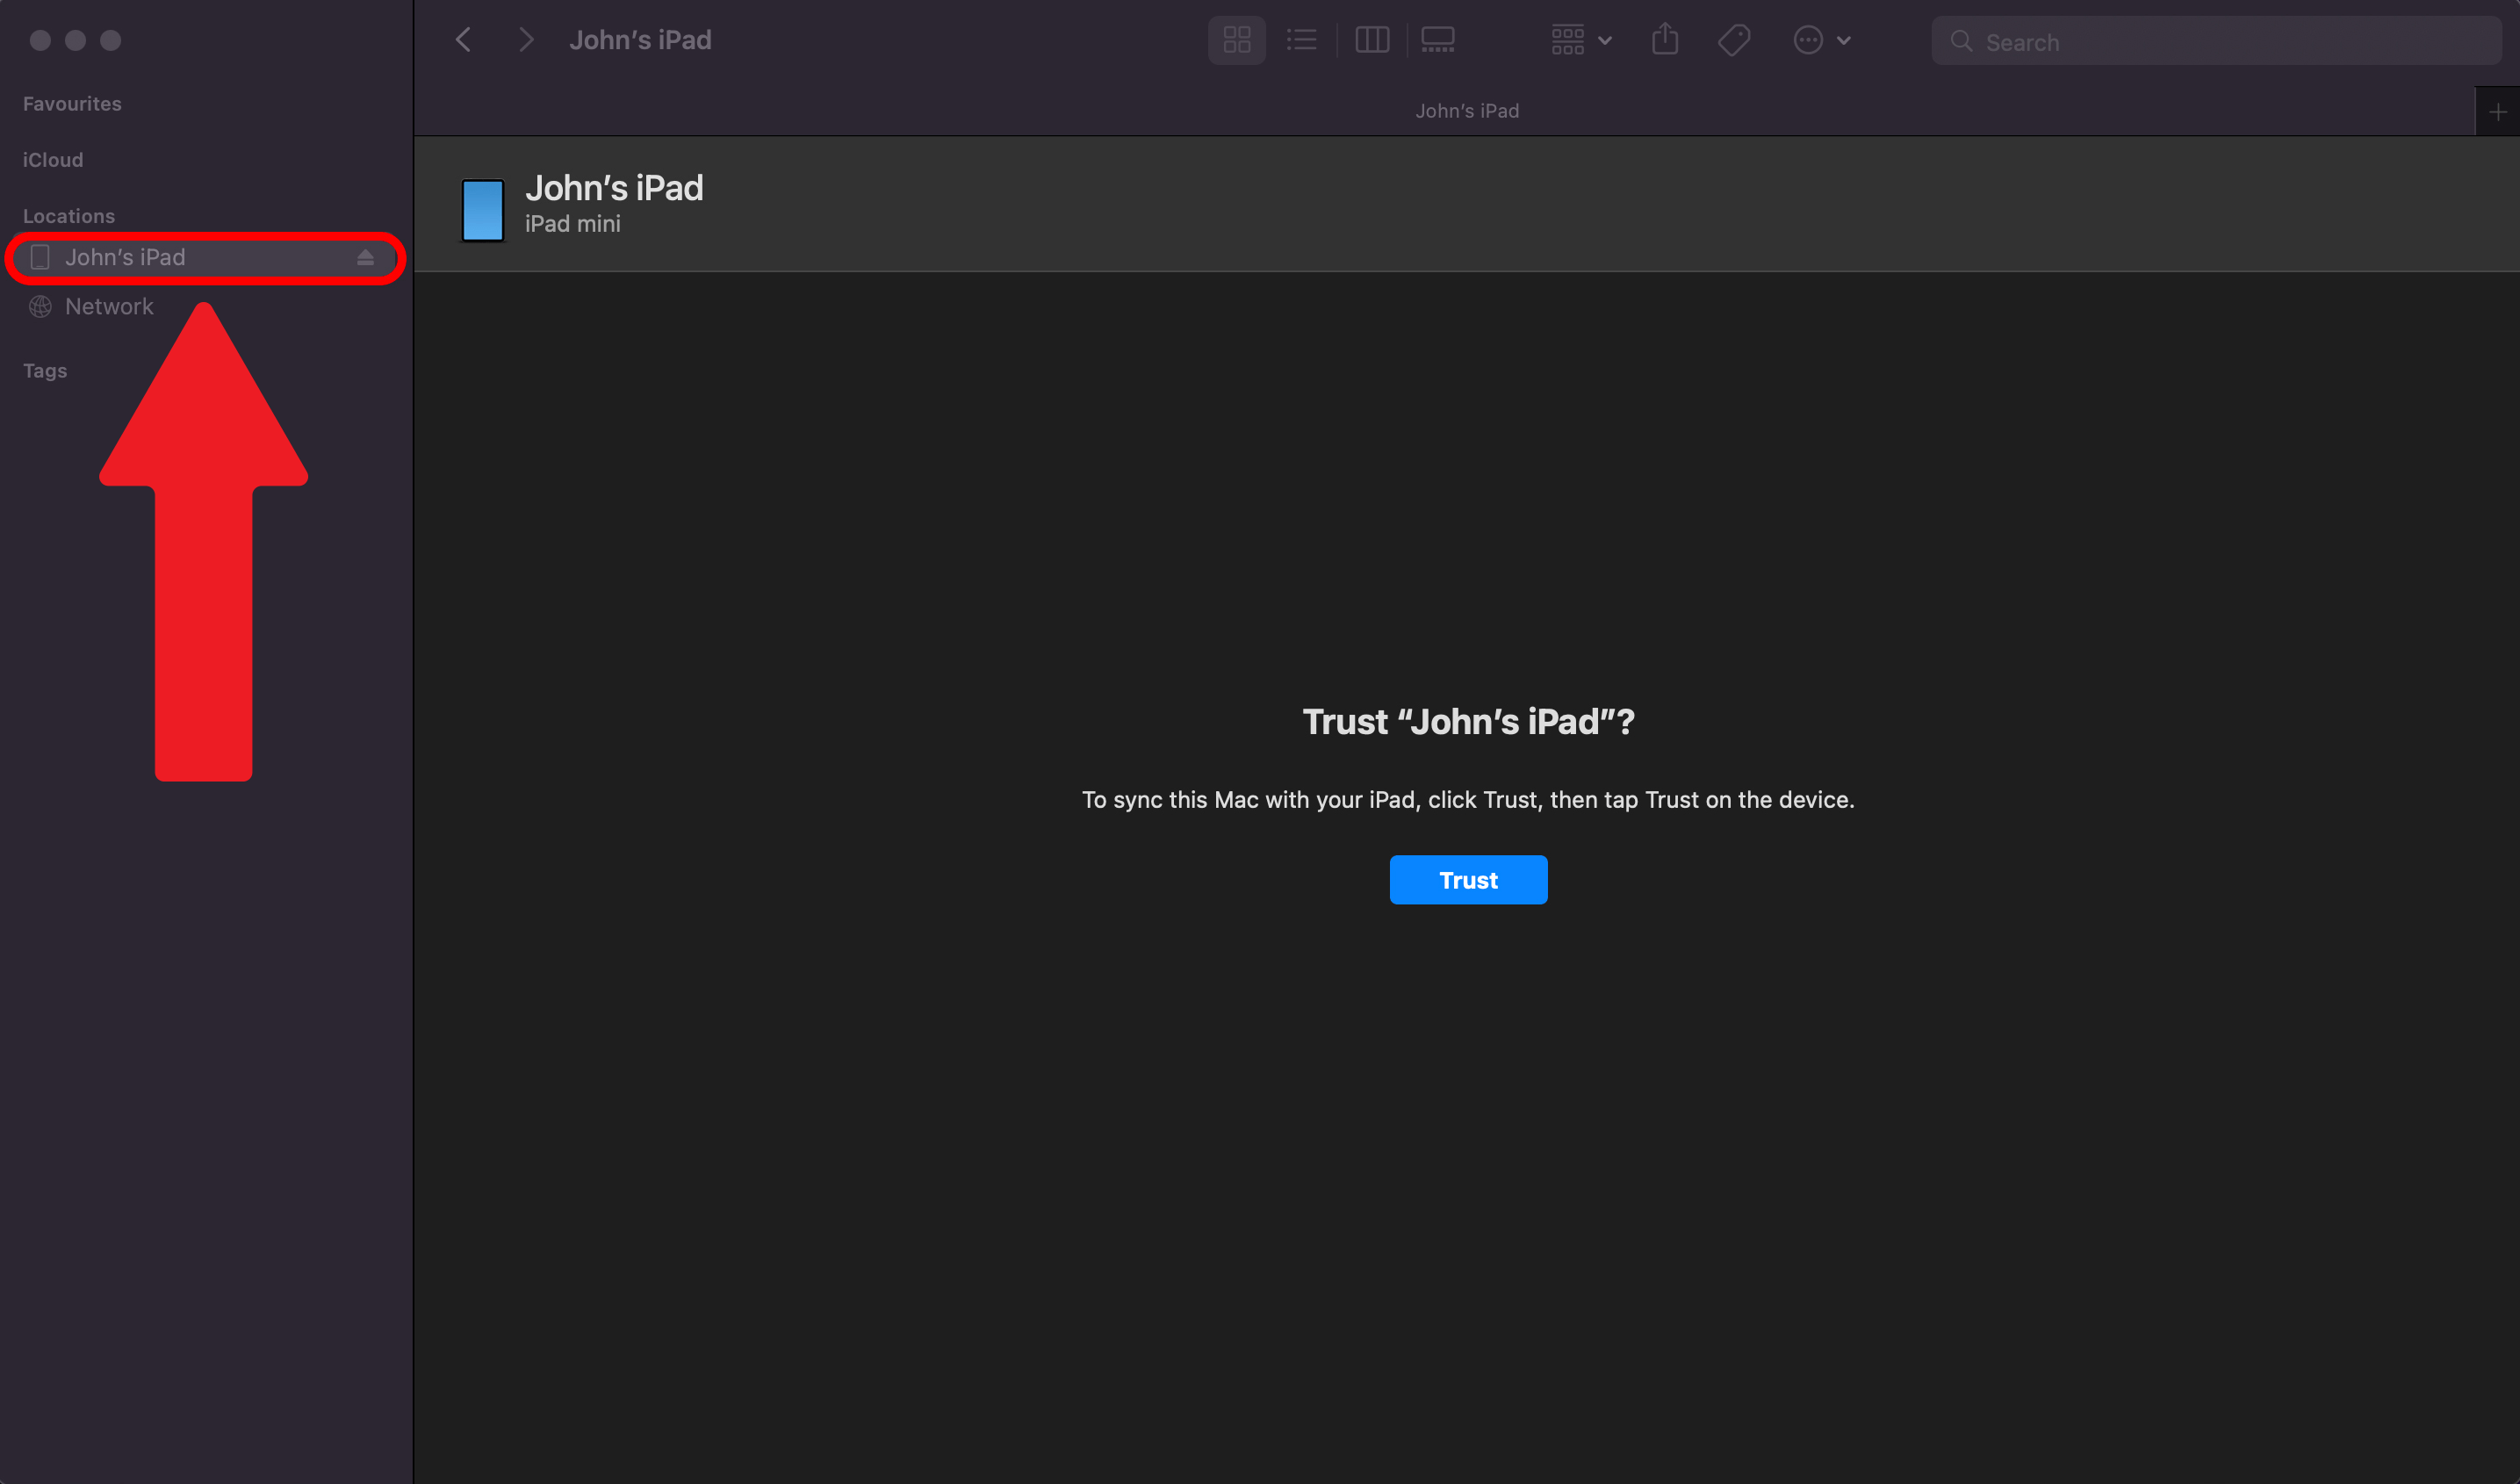
- On your Mac (running macOS Catalina or later), open a Finder window.
- Connect the iPhone or iPad to your computer with a USB cable
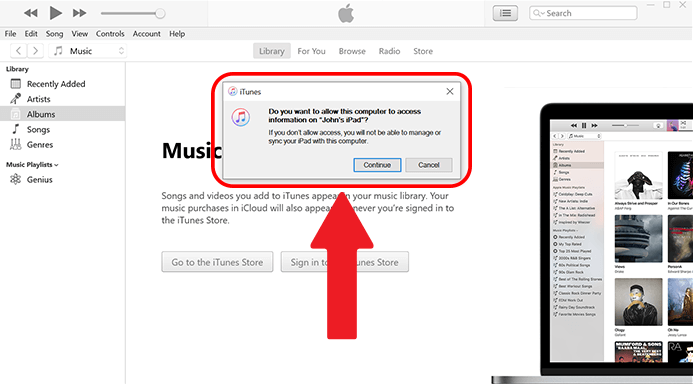
- On both your iPhone or iPad and Mac, you might have to tap ‘Trust This Computer’ and enter your passcode.
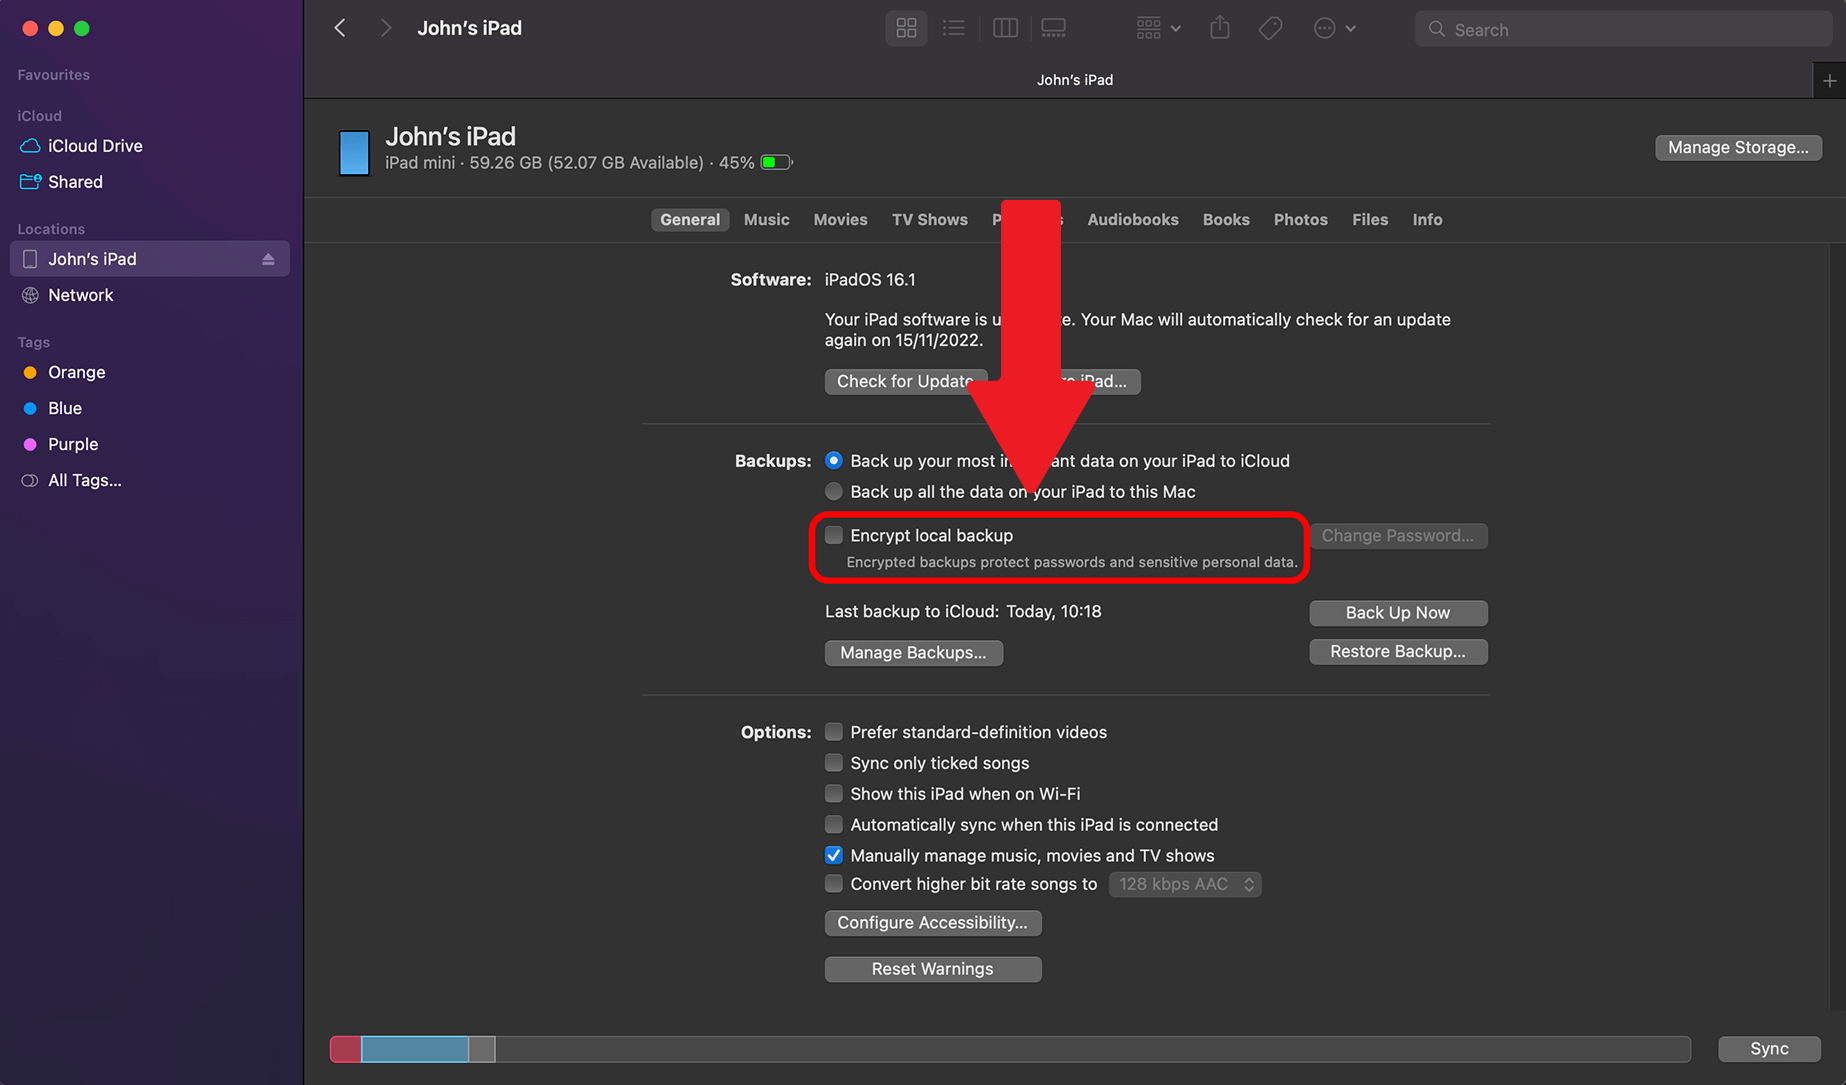
- In Finder, click on your iPhone or iPad as shown and highlighted in the image below.
- If you want to back up your saved passwords and other sensitive personal data, tick the option ‘Encrypt local backup’. You will be prompted to create a password for an encrypted backup. Save this password somewhere safe, as there is no way to recover your backup without it.
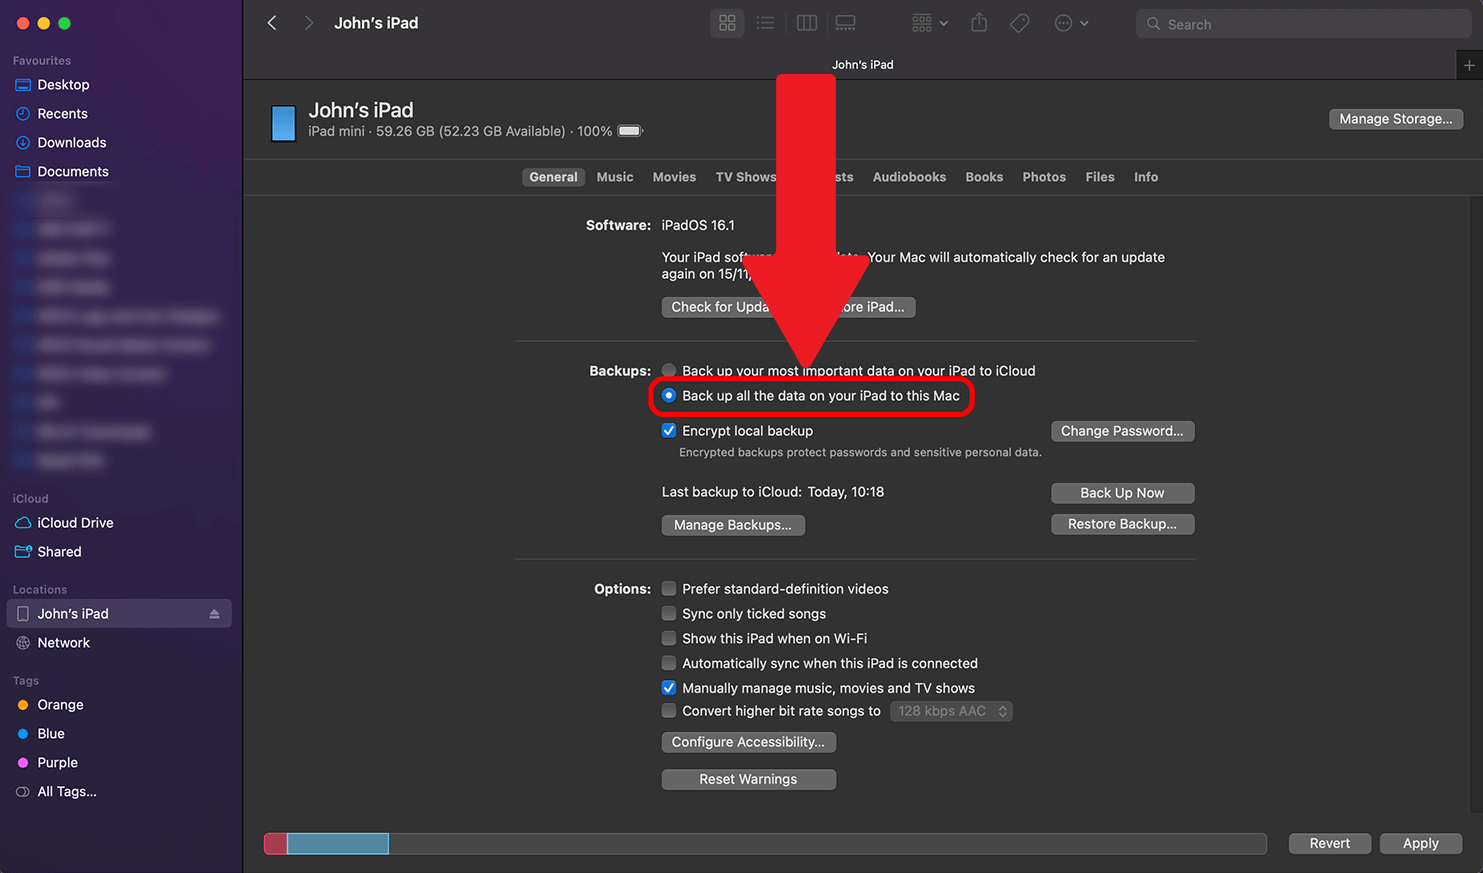
- Under backups, choose the second option ‘Back up all the data on your iPad to this Mac.
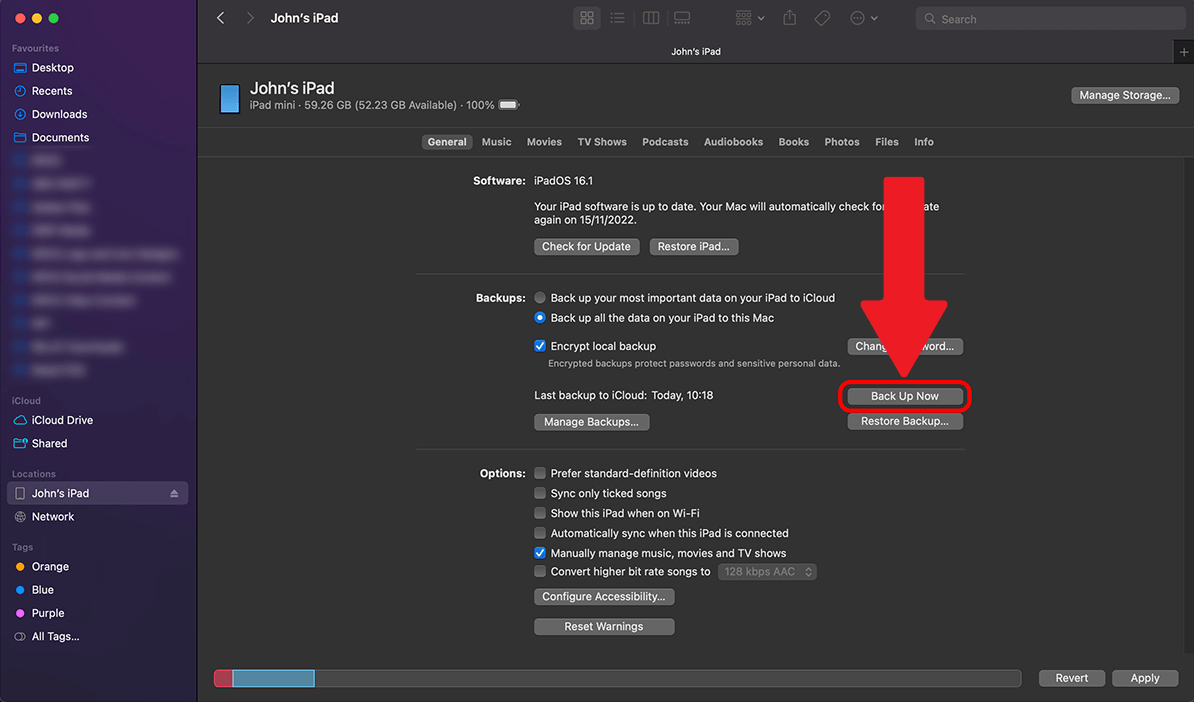
- Click ‘Back Up Now’.
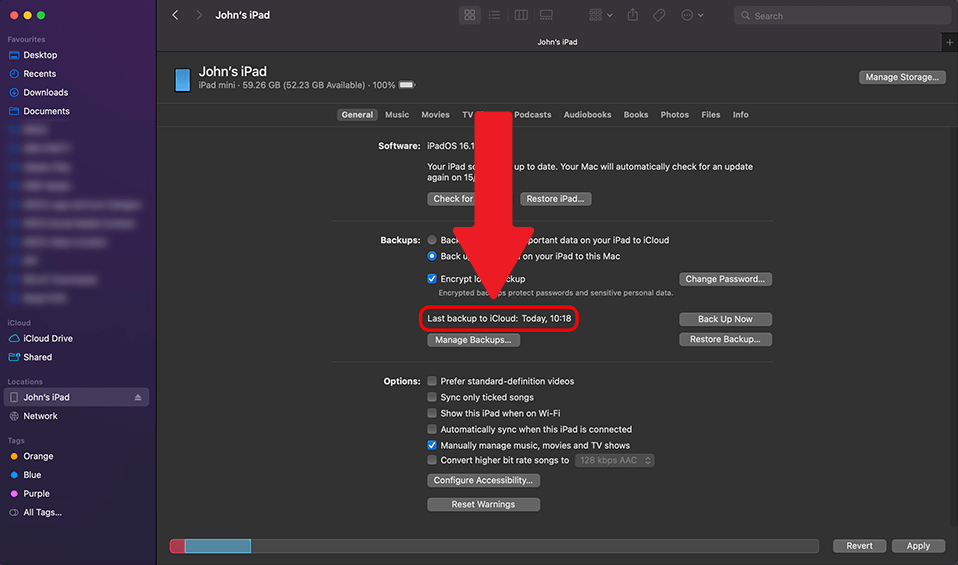
- When the backup is complete, you can see the latest backup at the bottom of the window.
To back up your iPhone or iPad on iTunes using a Windows PC:
- On your Windows PC, open iTunes. If you don’t have it, you can download it here.
- Connect your iPhone or iPad to your PC with a USB cable.
- On your iPhone or iPad, you might have to tap ‘Trust This Computer’ and enter your passcode.
- In iTunes, click on your iPhone or iPad as highlighted below.
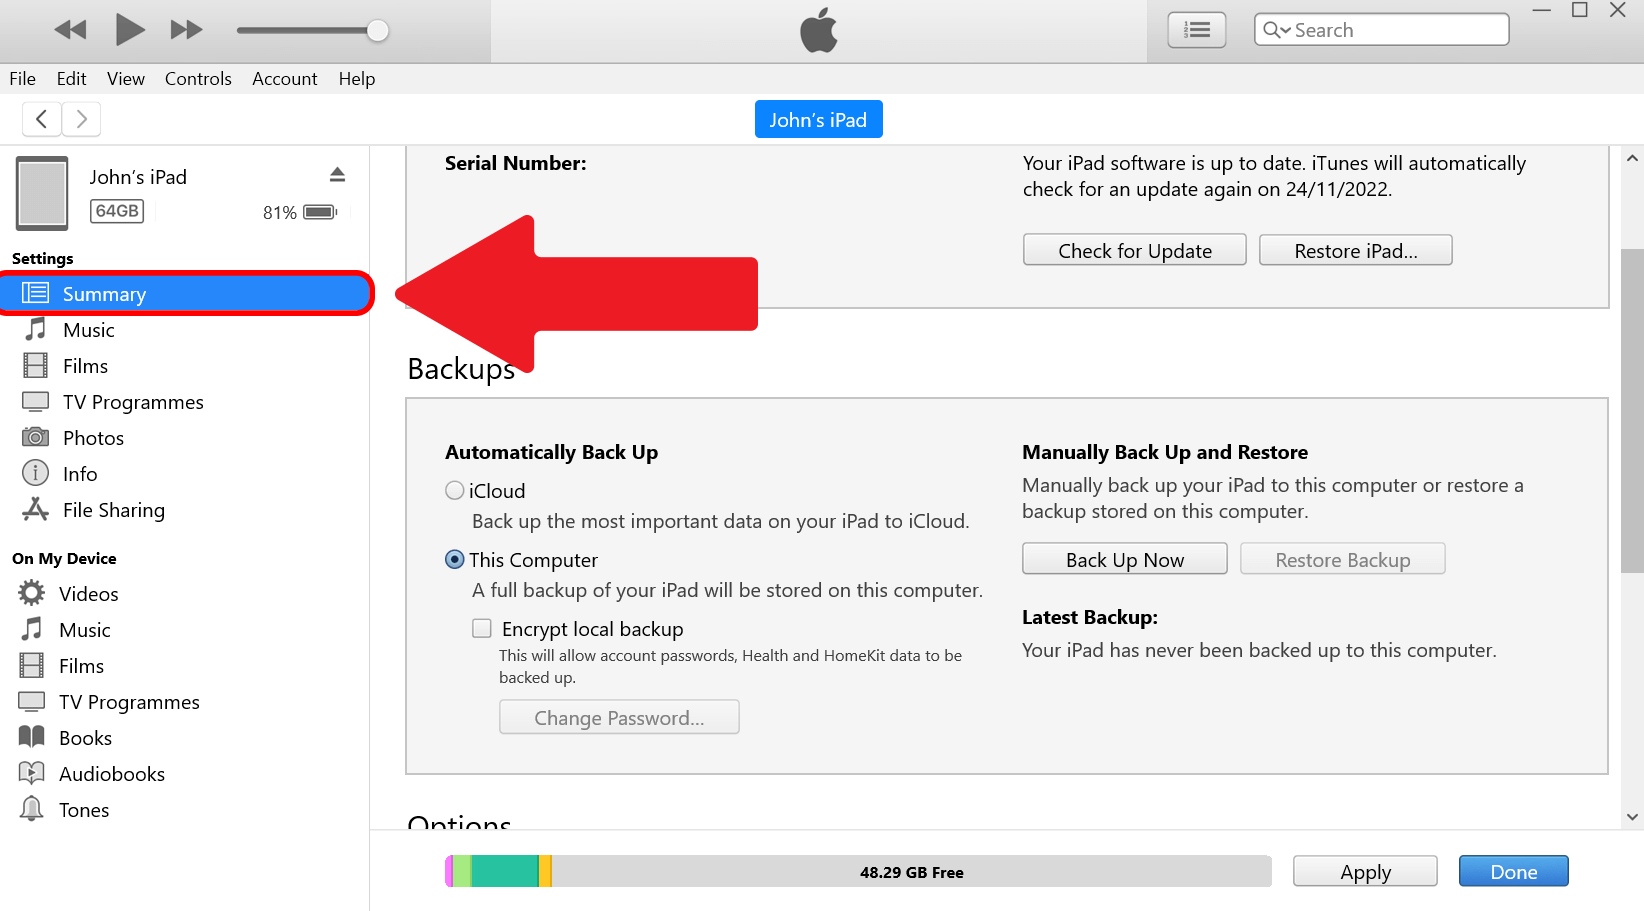
- Click on ‘Summary’.
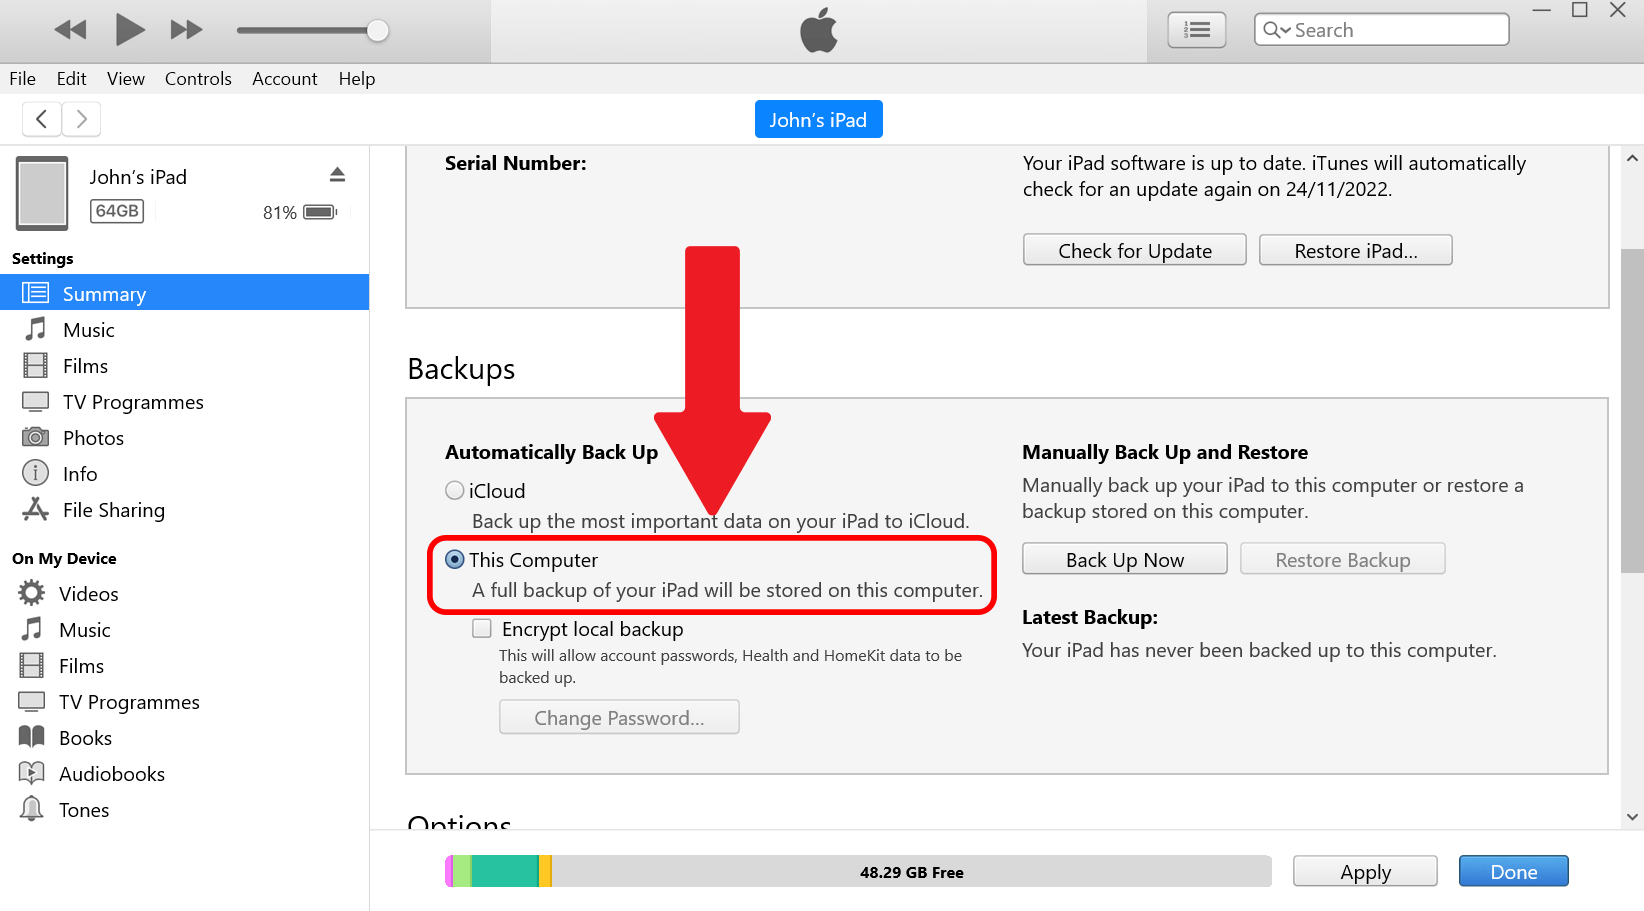
- Under backups, choose the second option ‘Back up all the data on your iPad to this Mac.
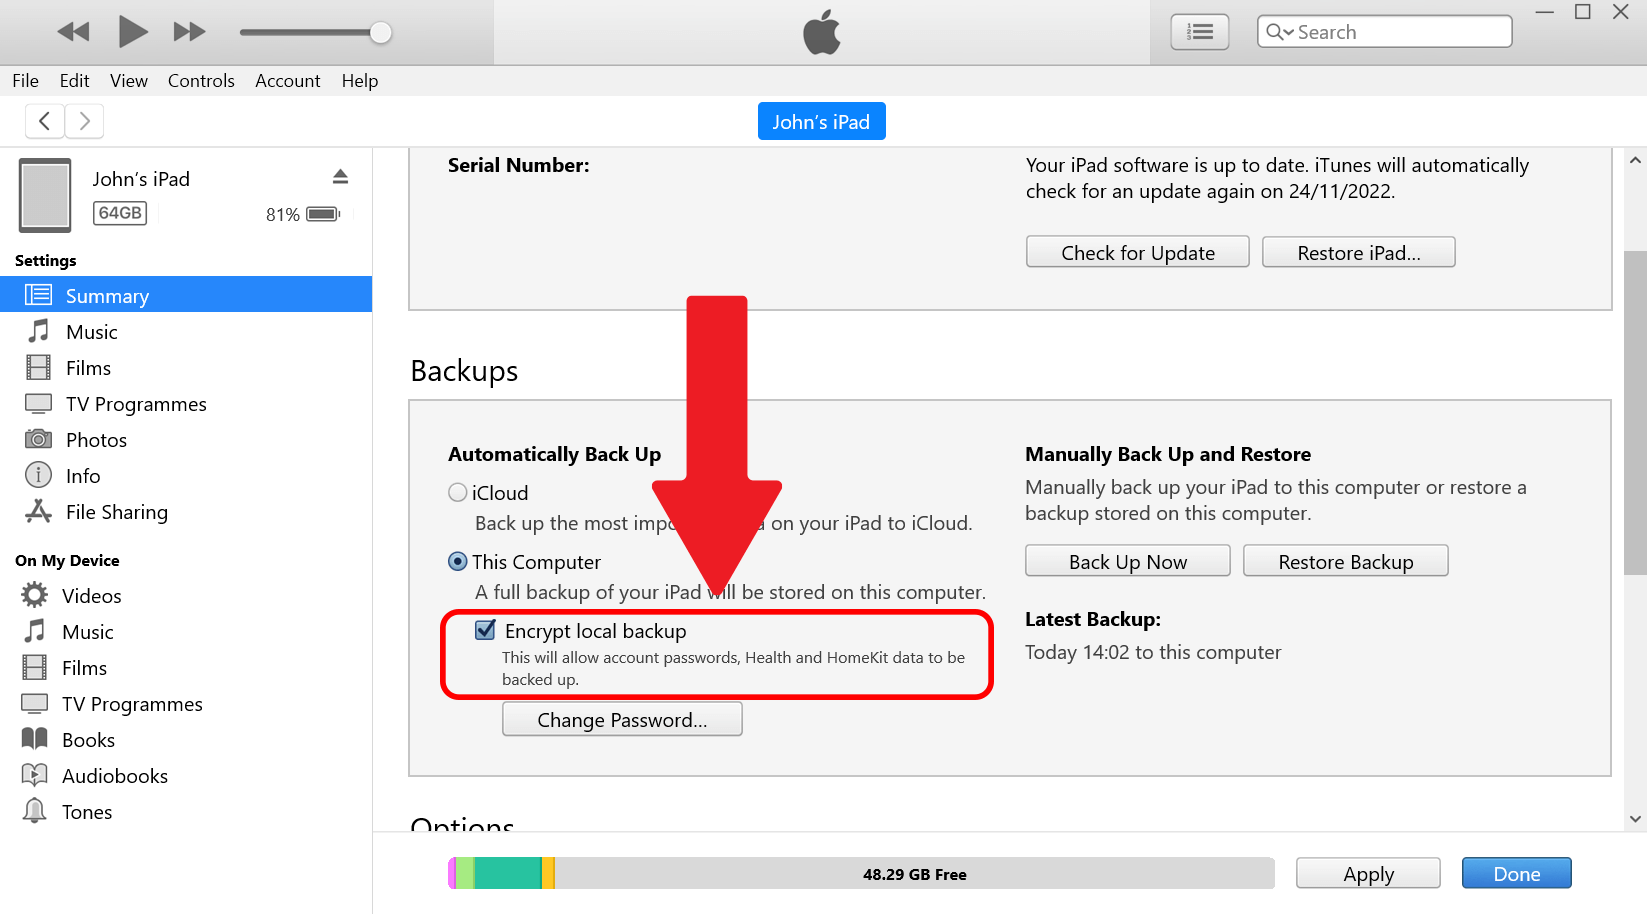
- If you want to back up your saved passwords and other sensitive personal data, tick the option ‘Encrypt local backup’. You will be prompted to create a password for an encrypted backup. Save this password somewhere safe, as there is no way to recover your backup without it.
- Click ‘Back Up Now’
- When the backup is complete, you can see the latest backup at the bottom of the window.


Turn off ‘Find My’ service
For some repairs, you will be asked to turn off or disable the ‘Find My’ service on your device. Below you will also find instructions on how to turn the ‘Find My’ off, and one of the steps is to enter your Apple ID password to confirm the change.
If you are unable to turn off the ‘Find My’, we may not be able to service your device. This is to prevent unauthorised repairs without your knowledge. If you don’t remember it, you can reset it at iForgot.
Turn Off ‘Find My’ using iPad or iPhone.
If your iPhone or iPad is still working, the quickest way to turn off the ‘Find My’ services would be to do it directly on your device. If you are able to do that, please follow the video tutorial below on how to do that.
Turn Off ‘Find My’ using a Web Browser.
If the device has a damaged display/touchscreen or is not powering off entirely, you can still turn off ‘Find My’ using a web browser, such as Safari or Google Chrome. For this, you’ll need to know your Apple ID information. To learn how to do that, see the video below.
Update your device to the latest version of iOS/iPadOS
It is highly recommended to update your iPad or iPhone before the service appointment. The service provider may need to access certain features or diagnostic tools that are only available on the latest operating system. By ensuring that your iPad or iPhone is up-to-date, you can help us quickly and accurately diagnose any issues you are experiencing.
To download the latest version of iOS or iPadOS:
- Ensure that your device is connected to Wi-Fi
- On your iPad or iPhone, open Settings
- Go to General
- Tap Software Update
- Tap Install Now, or Download and Install
- The update might take a while, and your device will restart during this process
- To learn more about updating your device, click here
Summary
Preparing your iPhone for a service involves a few simple steps that can help ensure that your device is ready to be repaired by a technician.
Firstly, you should create a backup of your iPad or iPhone to iCloud or iTunes, so that you don’t lose any important data during the service process.
Secondly, you should turn off 'Find My' to prevent unauthorised repairs and allow the Apple Authorised Technician to initiate the repair.
And finally, you should make sure that your iPad or iPhone is updated to the latest version of iOS or iPadOS, as this can help the technician diagnose and fix any issues more easily.
By following these steps, you can help ensure that your iPhone is ready for service and that the process goes as smoothly as possible.
Now your Apple device is ready to be serviced. At KRCS we are proud to be an Apple Authorised Service Provider. We only use genuine Apple parts, and all of our repairs are backed by Apple.